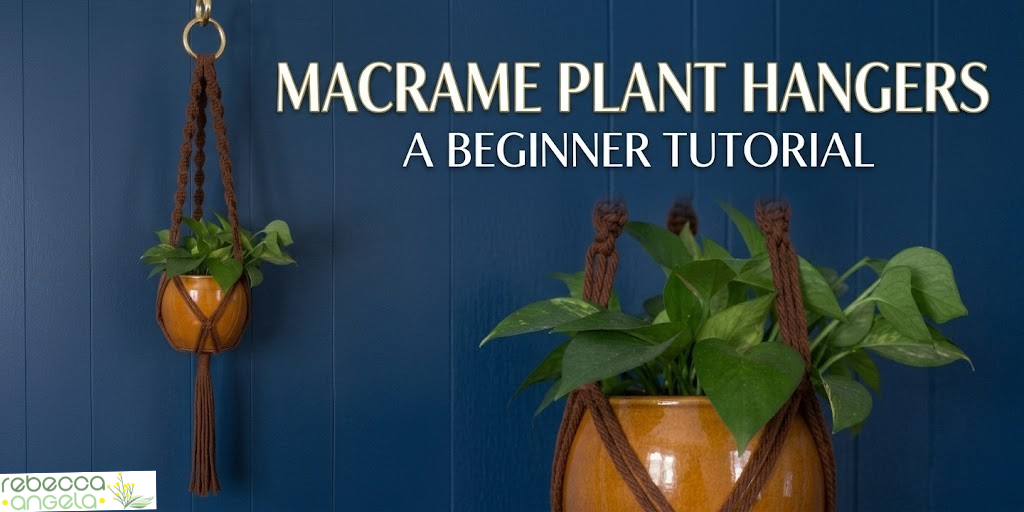

My mother made a plant hanger for every window in our house in the seventies. Every single window. There was a spider plant in the kitchen that hung so low I walked into it for most of primary school.
So it feels right that the plant hanger is the first thing I have properly made coming back to macrame, and it is the first project I would put in your hands too.
If you have arrived here without reading the start of the series, you will still be fine — but that post explains what macrame actually is and why I came back to it.
It is the obvious beginner project for good reasons. It uses four of the five knots, it is enormously forgiving of wobbly tension, it takes one evening, and at the end you have a thing that holds an actual plant. That last part matters more than people admit. Finishing something is what makes you want to start the next one.
So, on with the tutorial…
This makes a hanger about 90cm long from the top of the ring to the ends, sized for a pot around 15–18cm across. Sizing advice for going bigger or smaller is further down.
Materials
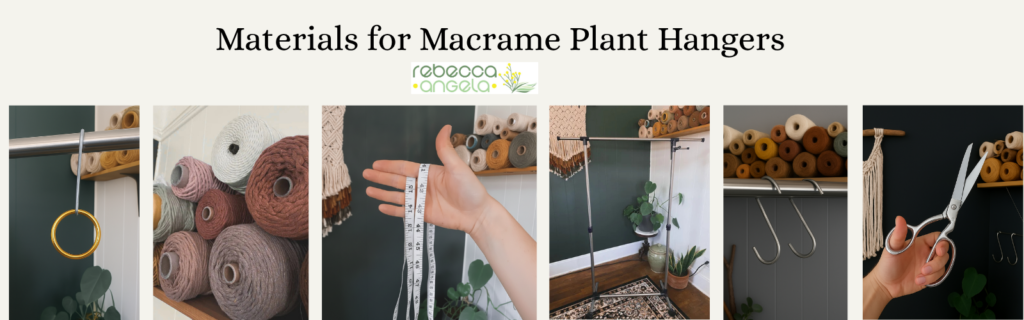
- 4 lengths of 4mm cotton cord, each 3.6m — these are your working cords
- 4 lengths of 4mm cotton cord, each 1.8m — these are your filler cords
- 2 lengths of about 80cm, one for each gathering knot
- 1 wooden or metal ring, about 5cm across
- Sharp scissors
- Tape measure
- Something to hang the ring from while you work — a clothes rail and an S-hook is ideal, or a coat hook, or a door handle
That comes to about 23m of cord in total, so a 100m roll leaves you plenty spare for a second hanger and a few keyrings.
Why 4mm? It is the diameter I recommend to every beginner in the cord and supplies post — thick enough to see what you are doing, fine enough to stay graceful on a hanger this size, and soft on the hands over a long evening. Three-ply cotton will give you a lovely wavy tail at the bottom when you comb it out. Single-strand works too and gives a smoother, more sculptural line.
Tip: Measure your first cord, then use it as a template to cut the rest rather than measuring each one from scratch. Faster, and far more accurate. This is the same principle as cutting accurately from a paper pattern, which I go on about at some length in Five Principles for Neat Sewing.
Instructions
Hang your ring at about chest height. Working with it hanging is much easier than working flat on a table — you can see the piece as it will actually hang, and gravity does some of your tensioning for you.
Step 1: Cut your cords
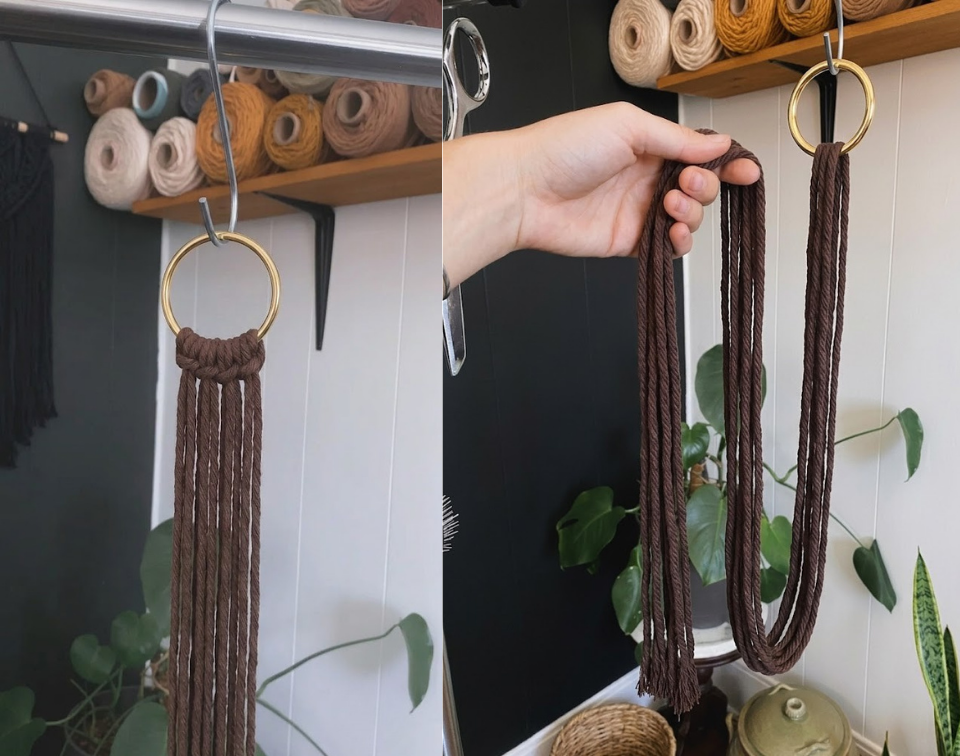
Four at 3.6m. Four at 1.8m. Keep the two piles separate — one long, one short, and the difference between them matters enormously in a moment.
Step 2: Attach them to the ring
Fold each cord in half and attach it to the ring with a lark’s head knot, alternating as you go around: long, short, long, short, and so on.
Note: this is the most important instruction in the whole tutorial. When you divide the cords into groups of four to start knotting, only the two outer cords in each group actually do any work — the two in the middle simply sit there and get knotted around. That is why they are called filler cords, and it is why they barely shorten at all as you knot.
So the long cords need to end up on the outside of each group, and the short ones in the middle. Alternating them on the ring is what makes that happen automatically once you divide into fours.
Get it the wrong way round and you will run out of cord partway down an arm, with no way to join it invisibly. I know this because I did it. There is more on why cords shorten so unevenly in the knots post.
Before you go further, check every cord is hanging evenly and every group of four reads long, short, short, long from the outside in. Check it twice. This is the two minutes that saves the evening.
Step 3: The top gathering knot
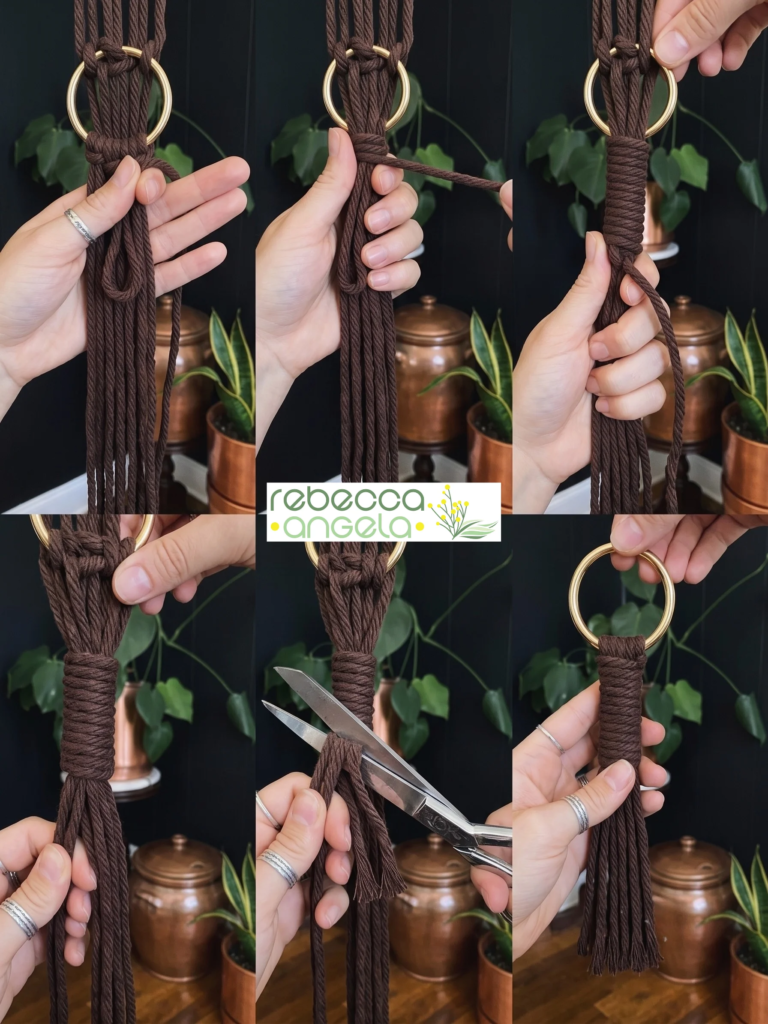
Take one 80cm length and tie a gathering knot around the whole bundle, starting a couple of centimetres below the ring and wrapping downwards for about 5cm — eight or nine firm wraps.
Wrap tightly. This knot carries the weight of the entire plant, so it wants to be neat and hard, not loose and decorative.
Thread the working end through the loop you left at the bottom, then pull the top tail upwards to drag it in and hide it under the wraps. Trim both tails and tuck them away with the point of your scissors.
If the gathering knot is new to you, it is stepped out properly in the knots post. It is the most satisfying knot in the whole craft and it looks far harder than it is.
Step 4: Four spiral arms
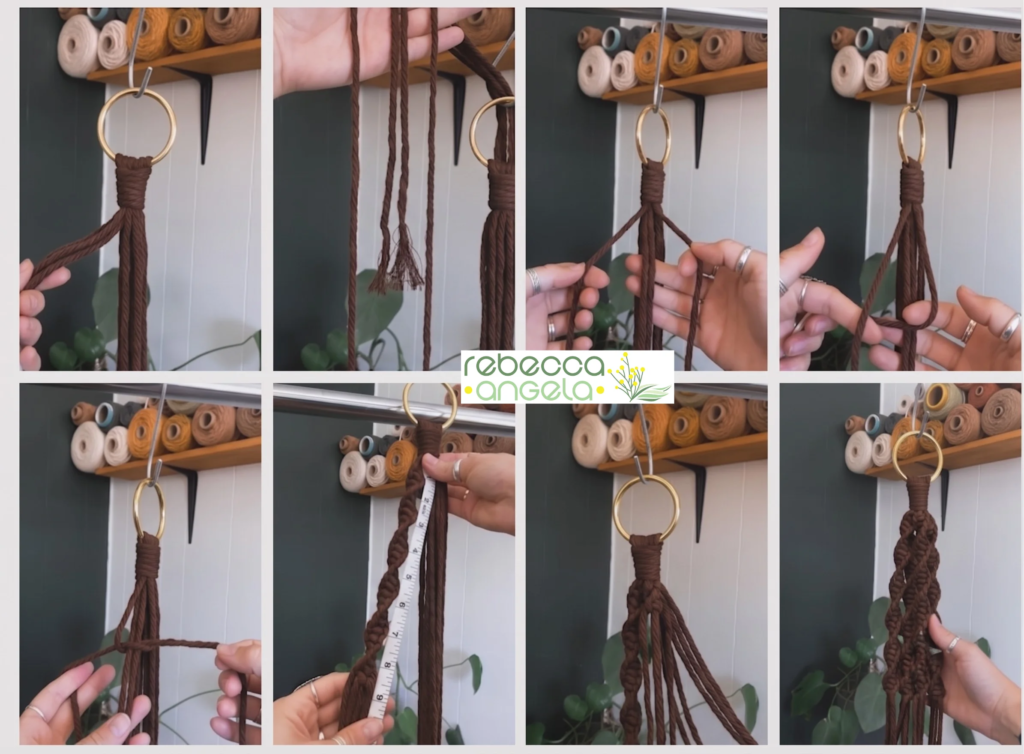
Divide your 16 cords into four groups of four, keeping them in the order they hang. Each group should read long, short, short, long.
Now tie half knots — the first half of a square knot, repeated without ever mirroring it — until each spiral measures about 20cm.
The work will twist itself into a corkscrew as you go. You are not doing anything clever; the knot is simply lopsided, and lopsided repeated enough times becomes a spiral. Let it rotate in your hands rather than fighting it.
Tip: Measure each section rather than counting knots. Tension drifts as the evening goes on, and thirty knots on your first arm may not be the same length as thirty on your fourth. Mine were out by nearly 3cm, and I discovered it at the worst possible moment.
Step 5: Two square knots down each arm
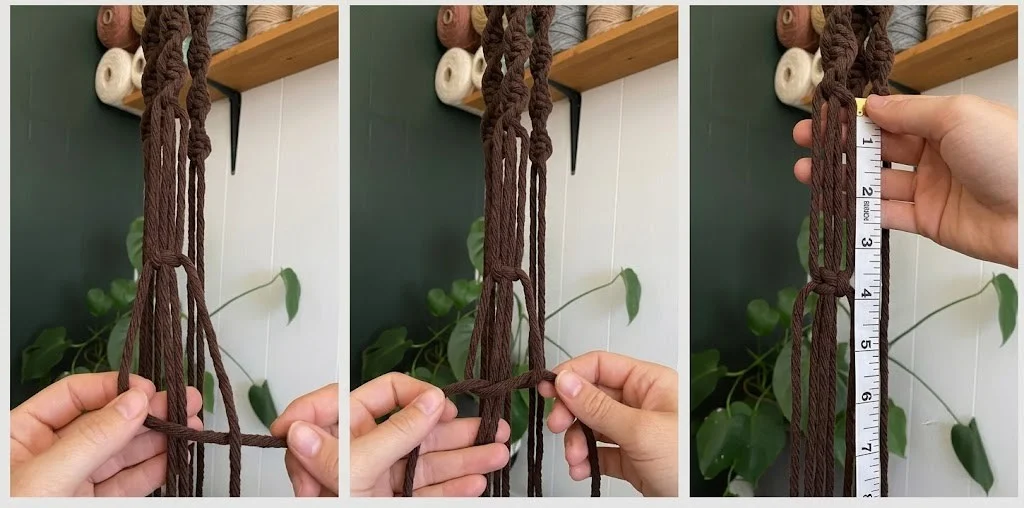
Leave a gap of about 8cm below each spiral, then tie one square knot in each group.
Leave another 8cm, and tie one more square knot in each group.
You should now have four arms, each with a spiral at the top and two single square knots below it, all sitting at the same height around the hanger.
Step 6: Join the arms into a cradle
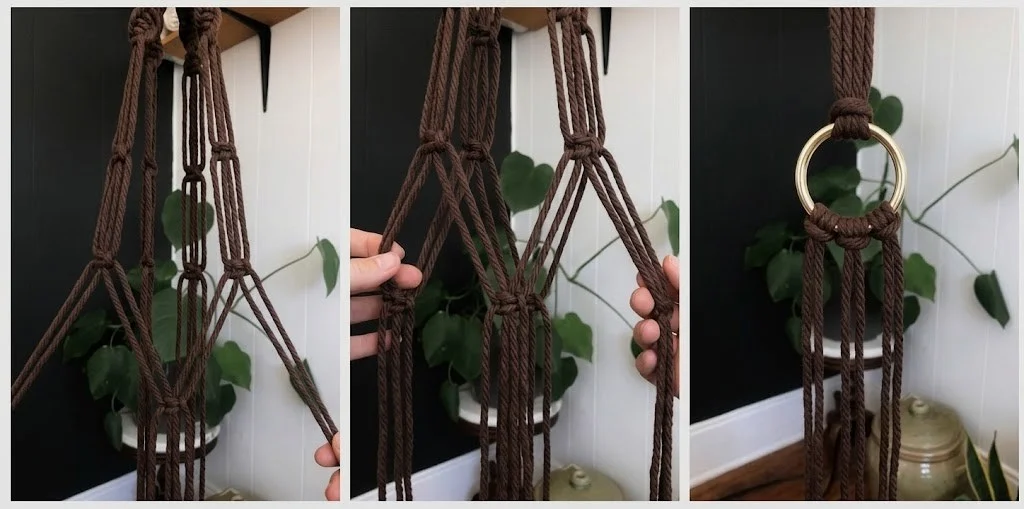
This is the part that turns four dangling arms into something that will actually hold a pot, and it is the bit that looks like magic the first time.
Leave another 8cm gap. Now, instead of knotting within each group, you knot across neighbouring groups.
Take the right-hand two cords from arm 1 and the left-hand two cords from arm 2, and tie one square knot with them. Move around: right two from arm 2 with left two from arm 3. Then arm 3 with arm 4. Then arm 4 with arm 1, which closes the circle.
Leave another 8cm, and do a second round the same way, offsetting again so each new knot sits between two knots from the round above.
Four diamonds, and suddenly you have a net that will hold a pot.
Note: Keep every joining knot at the same height. Sit back and look at the piece from a couple of metres away before you tighten them fully — a knot that is 2cm out of line is very obvious in the finished hanger, and very easy to correct now.
Step 7: The bottom gathering knot
Leave about 3cm below your last round of knots, gather all 16 cords together, and tie your second gathering knot with the other 80cm length. Wrap for about 4–5cm, exactly as you did at the top.
This is what pulls the whole thing into a proper hanger shape. Pull it tight.
Step 8: Trim the tail
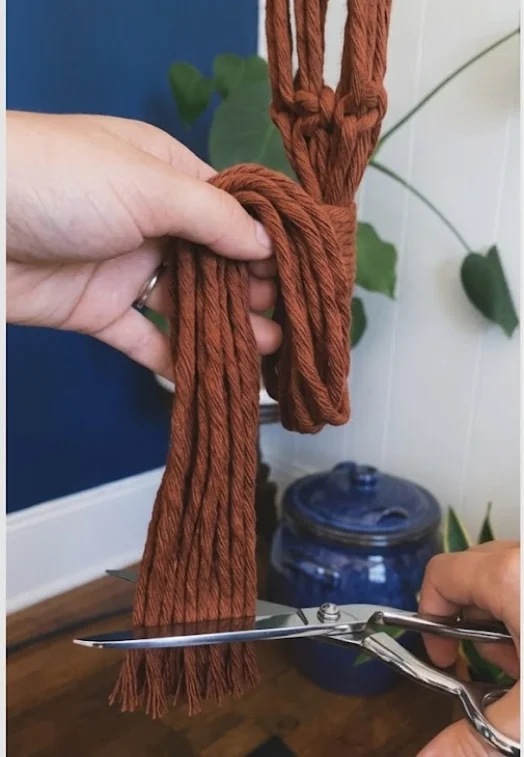
Put the pot in before you trim. Really — put the actual pot in and hang the whole thing up, because the weight changes how everything sits and the tail hangs differently loaded than empty.
Then measure from the top of the ring down and cut at about 90cm. I like leaving a reasonably long tail below the bottom gathering knot; it balances the spirals at the top and it looks deliberate rather than trimmed-to-fit.
Cut a little longer than you think, step back, look, and cut again. You cannot put it back.
If you want the soft cloud look, brush the ends out with a comb or a pet slicker brush until they fluff, then trim once more to tidy the shape. Three-ply cotton fringes beautifully. Braided cord will not fringe at all, which is one of the reasons I steered you away from it.
And you are done!
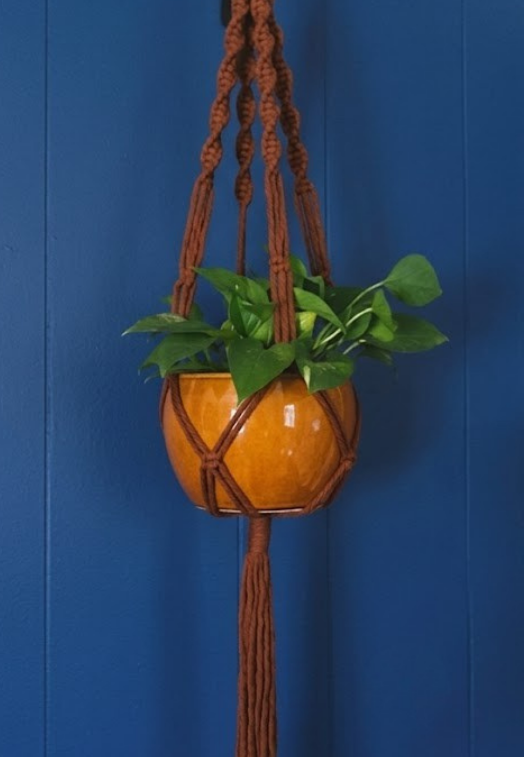
Changing the size
The proportions above are for a 90cm hanger holding a 15–18cm pot. To change it:
For a longer hanger, lengthen the working cords first — they are the ones doing all the knotting. As a rough guide, add 40cm to each working cord and 20cm to each filler for every extra 10cm of finished length.
For a shorter hanger, the reverse. A 70cm hanger works comfortably on 2.8m working cords and 1.4m fillers.
For a bigger, heavier pot, use 8 groups instead of 4 — eight long and eight short cut lengths, 32 working cords — and add a third round to the cradle.
For a tiny pot or an air plant, drop to 3 groups: three long and three short.
If you go off-piste entirely, the rule to carry with you is that working cords want to be about four times the finished length and fillers about half that. Be generous. Cutting cord too long costs you a bit of waste. Cutting it too short costs you the whole project, because there is no invisible way to join macrame cord partway up a piece.
Hanging it safely
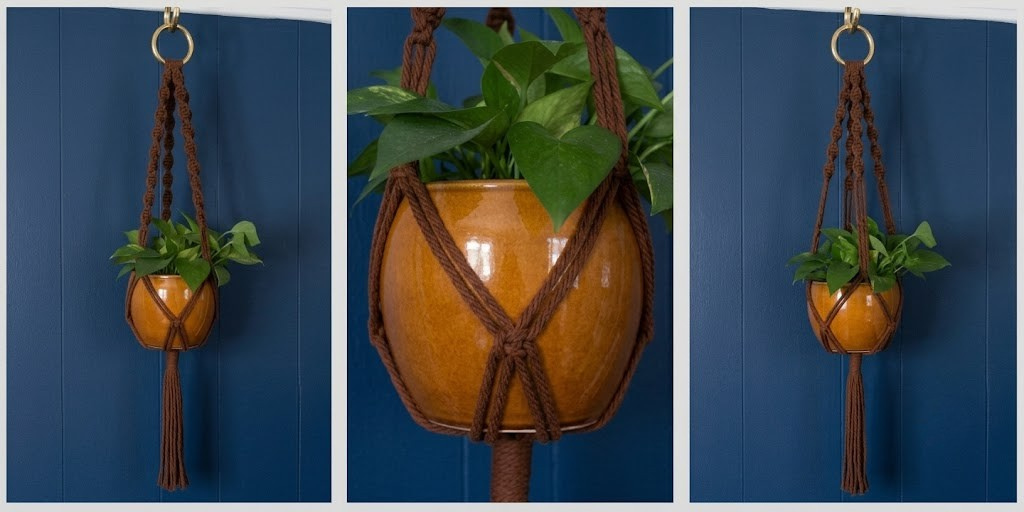
A word of warning, because this is where a lovely project turns into a hole in your ceiling and a broken pot.
Weigh what you are hanging, wet. An 18cm pot with damp soil and a healthy plant can easily hit 5kg. Water is heavy, and people almost always underestimate a wet pot.
Use a proper ceiling hook into a joist, or a rated toggle fixing for plasterboard. A picture hook is not enough. If you are not sure what is behind your ceiling, that is exactly what a stud finder or a handy neighbour is for.
Check your gathering knots by hanging the empty hanger and giving it a firm, steady pull downwards before you trust a plant to it.
If it is going outside, cotton will degrade in sun and rain over a season or two. Use a synthetic cord for anything permanently on the verandah — I go through the options in the cord post.
10 plant hanger variations to try
Once the basic one is under your belt, here is where to go next. All of these use the same five knots.
- The full spiral. Half knots the entire length of each arm rather than a 20cm section. Very seventies, very satisfying, and it eats considerably more cord — add at least a metre to each working cord.
- All square knots. A flatter, more modern look. Because square knots use both outer cords evenly, you can cut all eight cords the same length for this version — 3m each is about right.
- The triple cradle. Three offset rounds of joining knots instead of two, making a deeper net. Best for round or bulbous pots that want holding.
- The beaded hanger. Thread a large wooden bead onto the two filler cords between knot sections. Check the bead hole is at least 10mm for 4mm cord before you buy.
- The no-tail hanger. Finish at the bottom gathering knot and trim close for a clean, modern line.
- The tiered hanger. Three cradles down one long length of cords, holding three small pots one above the other. A gorgeous thing in a window — and you will want about six times the finished length in cord.
- The two-tone. Working cords in natural, fillers in a colour, or vice versa. The colours spiral around each other down the arms. Very effective, no extra skill required.
- The wall-mounted half hanger. Made flat against a wall on a small dowel rather than in the round. Good where you have no ceiling to hang from.
- The jute retro. The whole thing in 4mm jute, with wooden beads. This is my mother’s era exactly. It is rougher on the hands — do not learn on it, but do try it eventually.
- The driftwood ring. Swap the metal ring for a small piece of driftwood or a chunky branch cut short. Scrub and dry it thoroughly first.
Note on free patterns: there is an enormous amount of good free macrame material online, and a fair amount of vague, badly measured material too. Before you commit 23m of cord to somebody’s pattern, check it gives you actual cord lengths and a stated finished size. If it does not, treat it as inspiration rather than instructions. I have collected the ones I think are worth your time in the macrame patterns and ideas post.
What I got wrong
In the spirit of learning out loud, four confessions from my first hanger.
I put a filler cord on the outside of a group. Only one, in only one arm — and I ran out of cord two-thirds of the way down the spiral with absolutely no way to fix it. Two minutes of checking would have saved me an evening. Check your groups.
My four spirals were different lengths. I counted knots instead of measuring. Three centimetres of difference does not sound like much until the pot sits crooked.
My tension was tight at the top and loose at the bottom, because I did the top while I was fresh and concentrating hard, and the bottom at half past ten. Mum spent twenty minutes on the phone telling me about this, unprompted, and she was entirely right.
I trimmed the tail empty. Then I put the pot in, everything shifted, and my beautifully level ends were no longer level.
Not one of these ruined anything. Macrame undoes perfectly — no seam ripper, no damage, no holes left behind. You pull the cord back through and go again, which is why I keep saying it is such a kind craft to be a beginner at.
Questions people ask
How much cord do I need for a macrame plant hanger? For the 90cm hanger in this tutorial, about 23m of 4mm cord — four lengths at 3.6m, four at 1.8m, plus two 80cm lengths for the gathering knots.
Why are the cords different lengths? Because in each group of four, only the two outer cords do any knotting. The two in the middle are fillers — they get knotted around and barely shorten at all. Cutting four long and four short, and alternating them on the ring, puts the long ones where the work happens and wastes far less cord.
How long should a macrame plant hanger be? Most sit between 70cm and 120cm. Measure from your ceiling hook to where you want the base of the pot, then subtract the height of the pot itself.
What is the easiest macrame plant hanger for a beginner? This one, with square knots instead of spirals. That version needs only three knots — lark’s head, square knot and gathering knot — and you can cut all eight cords the same length.
How much weight can a macrame plant hanger hold? A hanger in 4mm cotton will comfortably hold a wet pot of several kilos — the cord is rarely the weak point. Your ceiling fixing is. Fix into a joist or use a rated toggle, and always test with a firm pull before trusting a plant to it.
Can I make a plant hanger without a ring? Yes. Fold the cords over a loop of cord instead and secure with your top gathering knot. It gives a softer look and one less thing to buy.
So there it is — the plant hanger, in an evening.
Mum’s spider plant is long gone, and I never did inherit any of her hangers, which I regret more than I expected to. So I have started making my own, and there is now one in the kitchen window that I fully intend to walk into for years.
Have you made one? Did you go spiral or flat, and did your tail survive the trimming? Tell me in the comments — and if something in these instructions is unclear, tell me that too and I will fix it.
Next in the series: Macrame Wall Hangings.