It is time to get your sewing machine out! Let’s get it threaded up today.
It goes without saying that a machine that is not threaded correctly will not sew satisfactorily. If my machine is not playing nice, the first thing (ok, the second thing after swearing a little) I do is to unthread it and rethread it. I think that solves the problem 95% of the time. I’ve threaded mine so many times now I could probably do it blindfolded – up to the point where I have to thread the needle! However, it is a bit of a daunting task when you are first facing it and getting it right is the difference between having fun and being frustrated.
Sewing Machine Manual
So, pull out your sewing machine manual and have a look at the (potentially confusing) threading diagram. Some machines also have arrows printed on the actual machine to guide you through the threading steps. If you have acquired a second hand machine, particularly an old one, it may not have a manual with it. That adds to the challenge, doesn’t it? Have a search on the Internet because often you will find a copy to download. If not, don’t despair. Even though all machine models are different, the threading basics are similar so I’m sure we can work it out!
I want you to have a look at how your own machine works because I am going to direct you to a YouTube clip which shows the threading of a machine but undoubtedly it will not be the same model as yours. If you have a look at your own machine first, I think you will be able to make more sense of the video and adapt the information to your machine model. You could also search for instructions for your make of machine (e.g. Janome threading instructions) and this may give you a closer approximation of your machine.
Threading Basics
So, I’ll run through the basics. Follow on your machine and in your manual as you read through this and then have a look at the video. If you have a machine which is much older there may be some significant differences. Now my machine is over 20 years old and I have an old one of my mum’s which is much older than that and they still basically thread the way I’m going to explain. However, some machines, like my mum’s vintage Singer, have a removable bobbin case for example. For this machine, there is another step in the process. The Internet is a wonderful thing – there is sure to be a video for all these variations so if you are having trouble, have a search and please, let me know if you need some guidance. I want to help and get you sewing.
OK, machine stitches are made with two threads – one from the upper spool and one from the bobbin below the needle plate. The first step is to fill a bobbin with thread. There is a bobbin winder and one or two guides on the top of the machine which allows you to take some of the cotton off your reel and wind it onto the bobbin. The bobbin is then inserted into the bobbin case below the needle plate after pulling back the cover. Sometimes the bobbin drops in horizontally, as it does on mine, or it is inserted vertically from the front or side. The bobbin is inserted into the bobbin case with the thread running anti-clockwise and then the thread is pulled back into a catch on the left side which holds it between the tension springs. A tail of thread is left hanging out of the bobbin case to pick up later.
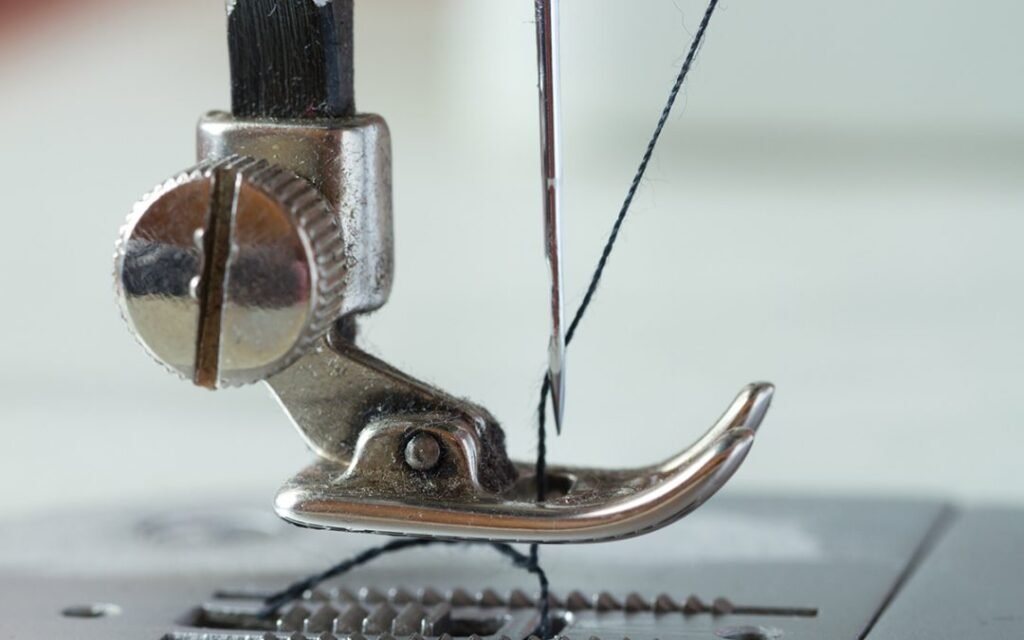
Now for the upper thread. Firstly, have a look at your machine needles. They have a flat and a curved side. The curved side has a small channel near the hole for the thread to run down. Machines may differ but usually the flat side of the needle is facing away from you when you insert it into the needle clamp. It needs to be inserted in the clamp right up until it stops and then secured firmly with the screw. Removing the presser foot before changing the needle makes the job a little easier. Needles need to be changed when they break (yes, it happens!), they get blunt (which is probably the case if your machine starts missing stitches) or you need a finer or thicker needle for the fabric you are using. I have this neat little guide I picked up once (click on it to read it). You might want to print it out for reference. I usually have a 80 or 90 size needle in my machine for general sewing.

OK, back to threading. The upper thread will come from the spool through a guide and then down, up and down again through the tension controls and take-up lever. The thread needs to be latched into a couple of guides or springs along the way so this is the trickiest and most specific to your machine part of the process.
The thread then comes down toward the needle and there will be one or two thread guides to latch it into before coming to threading the needle. The needle is then threaded front to back. Always trim your thread to a nice clean point so that it is easier to thread.
Now the bobbin thread needs to be brought up through the needle plate. To do this, hold both threads in your left hand while you turn the hand wheel to lower the needle and bring it back up again. This will loop the threads around one another and bring the bobbin needle up through the needle plate. Swipe through the gap between the presser foot and the needle plate with your scissors and pull the bobbin thread out to the left until the tail is completely free. Replace the bobbin case cover.
Ta da! Your machine is threaded!
So take a look now at this YouTube video and hopefully it will make how to thread your machine very clear. If you are still having problems, please let me know and we will work it out together. I want to be your guide over these hurdles to get you sewing! Of course, if you have an experienced sewer friend or family member who can guide you in person, all the better!
Test Your Stitches
The next thing to do is some test stitches on a scrap of suitable fabric. If the machine is threaded properly, you should be able to make nice even stitches without the fabric buckling or the bobbin thread getting all bunched up on the underside.
Sewing Machine Tension
The tension of the stitches may need some adjustment too. There is a tension dial on your machine near the take-up lever. The threads should loop together within the fabric so that you just see nice neat stitches on either side. If not, loosen or tighten the tension of the needle thread according to this diagram.

Once you have a correctly threaded machine and beautiful neat stitches, you are ready to sew! Yay!
In the next Learn-to-Sew post we’ll talk about making your first stitches and sewing straight. I’ll also suggest some beginner projects.
Good luck and let me know how you are getting on with treading your machine!


Pingback: Learn-to-Sew: Sewing Straight and Easy Beginner Projects - Rebecca Angela