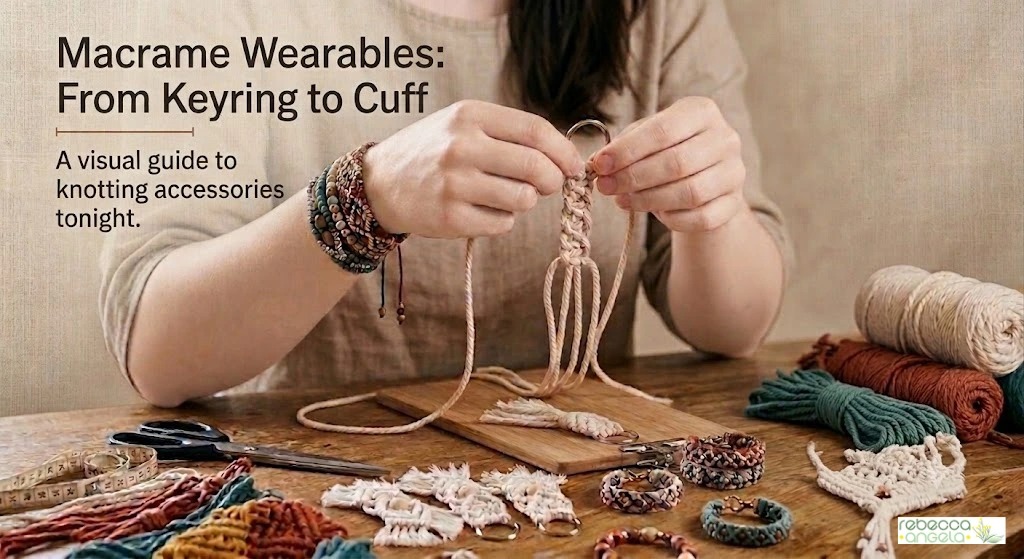
If you want to learn macrame tonight, with cord you already have, and finish something before you go to bed — make a keyring.
I am quite serious about this. A keyring uses one knot, about two metres of cord and ten minutes. It is the fastest possible way to get the square knot into your hands, and unlike a practice piece tied to a chair leg, you end up with something you can actually put your keys on.
It is also, I would argue, the single best macrame project to do with a child. My mother started me on a chair leg because that was what was to hand, but if she had handed me a key ring and told me I could keep whatever I made, I suspect I would have paid rather more attention.
So this post starts small and works up: keyring, bracelet, necklace, belt, and a word about the macrame clothing that keeps turning up in shops. If you have not met this series before, it starts here.
Tutorial: A Macrame keyring in ten minutes
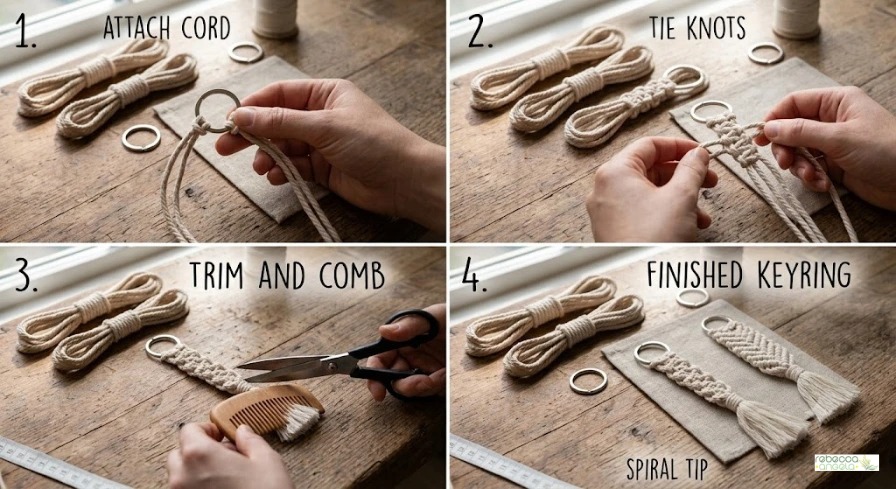
You need:
- 2 lengths of 4mm cotton cord, each 70cm
- 1 key ring or split ring, about 25–30mm
- Scissors, and a comb if you want a fluffy tassel
Instructions:
Fold each cord in half and attach both to the key ring with a lark’s head knot. You now have four working cords, each about 35cm long.
Take the outer two as your working cords and the middle two as fillers, and tie eight square knots down the length. (If you need a refresher, all five knots are stepped out in the knots post.)
Trim the ends level, about 5cm below your last knot. Comb them out into a tassel if you would like, and give the shape a final tidy trim.
And you are done!
Tip: For a spiral keyring instead, tie sixteen half knots rather than eight square knots. Same cords, same time, completely different look — and it teaches you the spiral without committing to a whole plant hanger arm.
Tutorial: a square knot bracelet
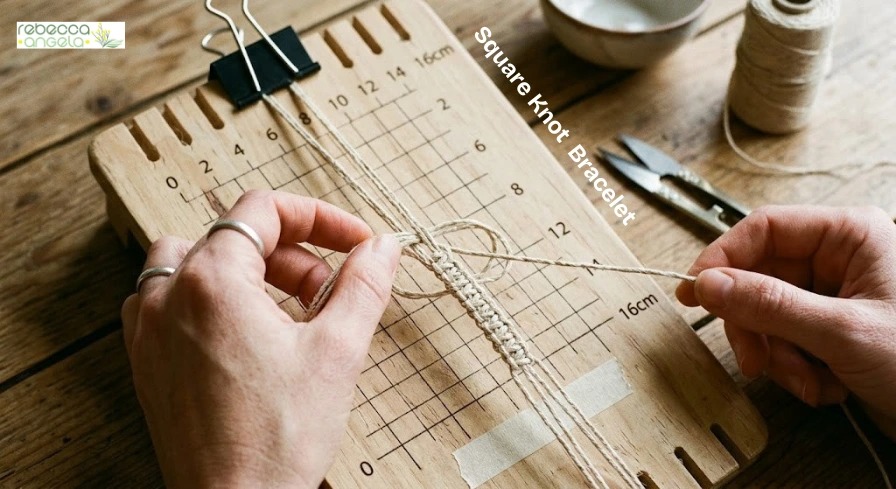
Slightly fiddlier than the keyring, and worth it.
You need:
- 2 lengths of fine cord (1–2mm hemp or waxed cotton), each 60cm — these are your fillers
- 1 length of the same cord, 1.5m — this is your working cord
- 1 short length, about 30cm, for the closure
- A safety pin, a bulldog clip, or a macrame board with pins
Instructions:
Lay your two 60cm fillers side by side and fold your 1.5m working cord in half around them, so you have two filler cords in the middle and two working cords on the outside. Pin the whole lot down — to a cushion, a clipboard, or a macrame board.
Tie square knots all the way along until the knotted section measures about 15cm, or long enough to sit around your wrist with a couple of centimetres to spare at each end.
Trim the working cords close and leave the two filler cords running out of each end.
For the sliding closure: bring the two ends of the bracelet together so the loose filler cords overlap and run in opposite directions. Take your 30cm length and tie six or seven square knots around the overlapping section, using the overlapping cords as fillers. Trim and tuck.
Pull the two ends and the bracelet slides open. Push them and it tightens. Very satisfying, and it means one size genuinely fits everyone.
Note: Keep your tension consistent from end to end. A bracelet is small enough that uneven knots really show — much more than they would on a plant hanger, where everything is in the round and forgiving.
Three bracelet variations
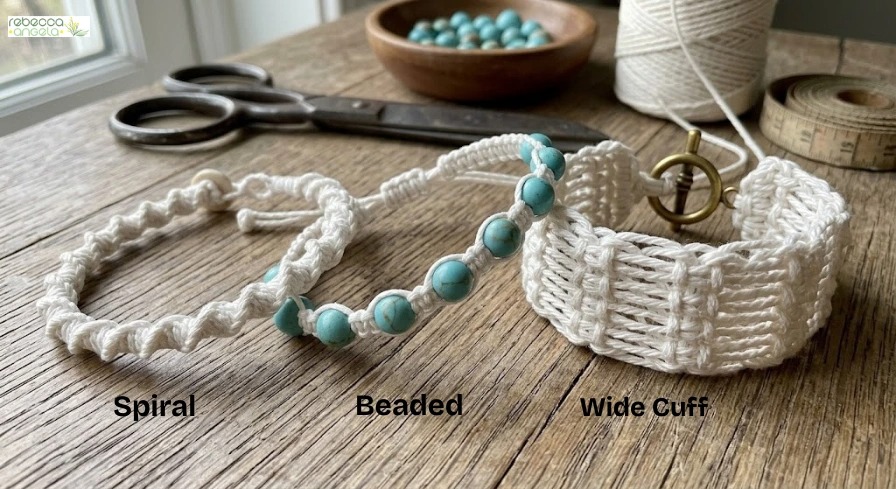
The spiral. Half knots the whole way instead of square knots. It corkscrews around the wrist and looks considerably cleverer than the effort involved.
The beaded. Thread a bead onto the two filler cords every four or five square knots. Check the bead hole takes two strands of your cord before you buy — bead hole size is the most common online-shopping regret in this whole craft, as I grumble about in the cord and supplies post.
The wide cuff. Six or eight filler cords instead of two, with two or three columns of square knots side by side, alternating between columns to lock them together. Chunky, and a good use for slightly thicker cord.
Macrame necklaces
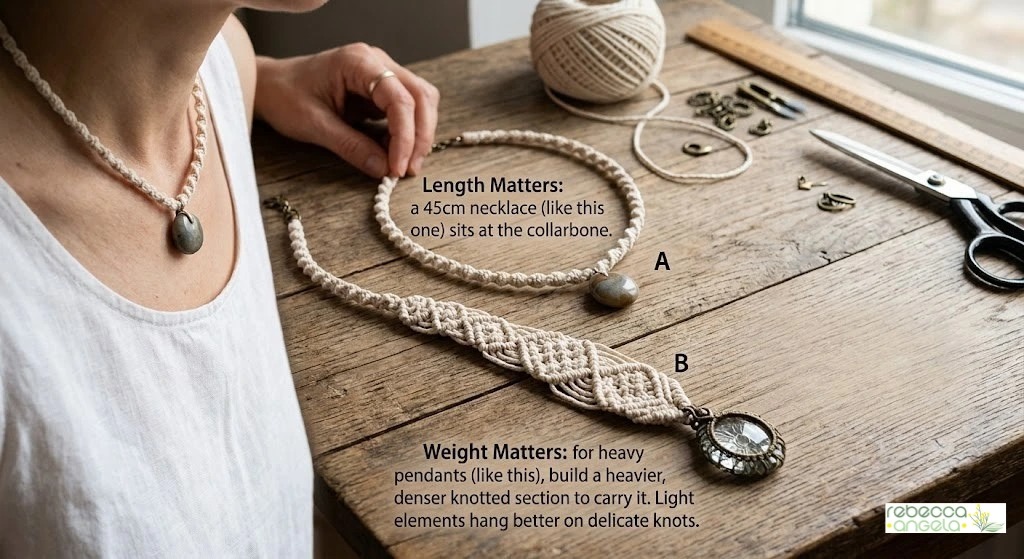
A necklace is a bracelet that got ambitious, and it is made exactly the same way — a long band of square knots or half knots, finished with a sliding closure or a clasp.
Two things worth knowing:
Weight matters. A pendant or a heavy bead will drag the knotting out of shape and make the whole thing hang oddly. Keep whatever you hang from it light, or build a heavier, denser knotted section to carry it.
Length matters more than you think. Measure a necklace you already own and like, and copy that. A 45cm necklace sits at the collarbone; 60cm sits mid-chest. Guessing produces something that sits in the exact wrong spot and never gets worn.
Macrame belts
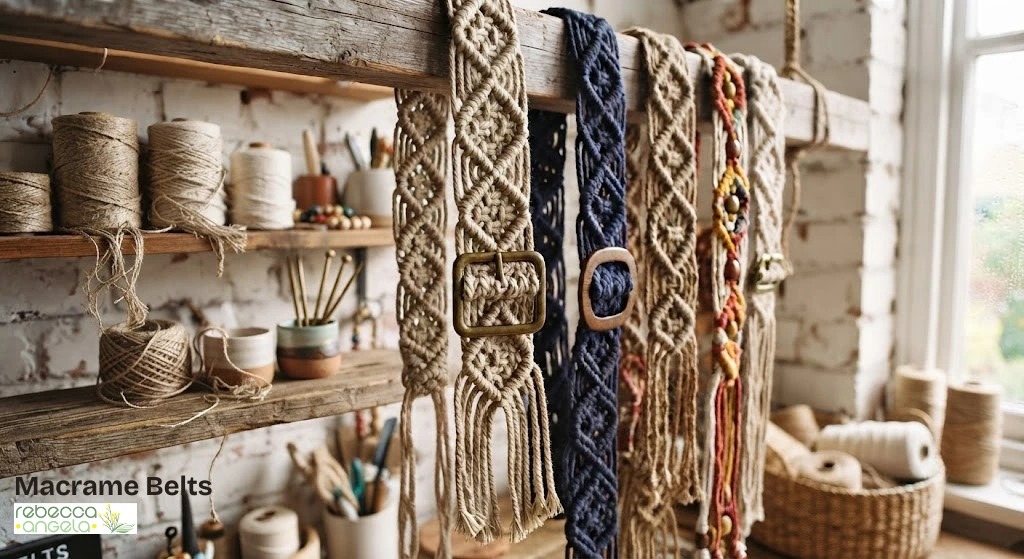
This is where the seventies really show, and I mean that entirely as a compliment.
A belt is a long, wide band of square knots — usually 6 to 10 cords wide — with either a buckle threaded on at one end or long tie ends. Hemp is traditional and holds its shape well; cotton is softer and will stretch a little with wear, which is worth knowing before you make one to an exact measurement.
Tip: Make it 10cm longer than you think. Belts stretch, waists change, and a belt that is slightly too long can be trimmed and re-finished. One that is too short is firewood.
A note on macrame dresses and clothing

People search for macrame dresses a great deal, and I want to be honest: the ones you see in shops are almost always machine-made lace or crochet-effect knit rather than hand-knotted macrame. True hand-knotted macrame clothing exists, but it is slow, heavy and quite firm — it does not drape the way a woven or knitted fabric does.
Where hand macrame genuinely shines on the body is in accessories and panels: a knotted yoke on a plain top, a fringed hem, a bag, a belt, a shawl edging. That is macrame doing what it is good at — texture and structure — rather than trying to be fabric.
If you are interested in that crossover between making and wearing, I wrote about turning a creative practice into wearable art a while back, and everything in it applies here.
Cord for jewellery is different
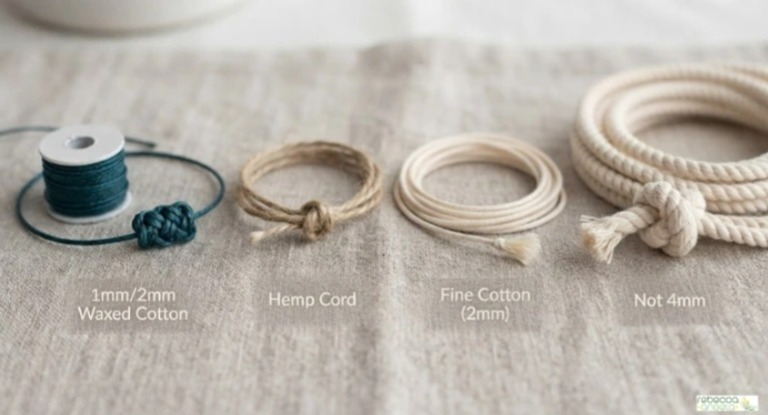
Everything else in this series wants 4mm cotton. Jewellery does not.
- 1mm or 2mm waxed cotton — holds a knot crisply, does not fray, and the wax means the ends can be sealed. My preference for bracelets.
- Hemp cord — the traditional choice. Strong, fine, holds its shape, softens with wear. Slightly rough at first.
- Fine cotton (2mm) — softest against the skin, but it fuzzes with wear and the ends need finishing.
- Not 4mm cotton. It makes a bracelet the size of a wristband on a watch strap for a horse. I speak from experience.
A word on ends. Waxed cotton and synthetic cord can be sealed with a very quick pass of a flame. Natural cotton and hemp cannot — use a dab of clear craft glue, or tie the tails into small overhand knots and trim.
Making these with children
Macrame is a genuinely good craft to do with kids, and better than most for older children in particular. The result looks properly made rather than obviously childish, which matters enormously somewhere around ten or eleven.
- Keyrings for a first go. Ten minutes, a real object at the end.
- Bracelets for anyone who likes friendship bracelets, which is most children at some point.
- Bookmarks for the ones who read.
Use 3mm or 4mm cotton with children rather than fine cord — bigger is much easier for small fingers, and easier to undo when it goes wrong. And it will go wrong, which is rather the point.
I put together a list of things to sew with boys some years ago because so many kids’ craft projects are aimed at a very narrow idea of who wants to make things. Macrame belongs on that list. It is knots and rope. I have yet to meet a child who is not interested in knots and rope.
Questions people ask
What cord do I use for macrame bracelets? 1mm or 2mm waxed cotton, or hemp cord. Fine, strong and crisp. The 4mm cotton used for plant hangers is far too thick for jewellery.
How much cord do I need for a macrame bracelet? About 2.5m in total — two 60cm filler cords, one 1.5m working cord and 30cm for the closure.
How do you finish a macrame bracelet? A sliding closure is easiest and fits any wrist: overlap the loose end cords in opposite directions and tie a short band of square knots around them. Pull to open, push to tighten.
What is the easiest macrame project for beginners? A keyring. Two cords, a key ring, eight square knots, ten minutes.
Can you wash macrame jewellery? Cotton and hemp can be hand washed gently in cool water and dried flat, though they may shrink slightly and stiffen. Waxed cotton should just be wiped — washing strips the wax.
How do you stop macrame bracelet ends fraying? Waxed and synthetic cords can be sealed with a brief pass of a flame. Natural cotton and hemp need a dab of clear glue or a small overhand knot instead.
So — start with the keyring. Ten minutes, and you will know by the end of it whether this craft is for you.
I have made rather a lot of them now. There is a small basket of them by the door and everyone who visits leaves with one, whether they wanted one or not.
What are you making first? And if you have a child who wants to join in, tell me how it goes — I would love to know whether they take to it faster than I did at seven. They probably will.
Next in the series: Macrame for the Home.