How are you going with your straight seams? Have tried any of the easy projects? I’ve made a list of more projects with only straight seams. Today I’m bringing you one more – a cube door stop project. Difficultly-wise, I would say it is suitable for the patient beginner. It isn’t difficult but a little care is needed to make sure it works out beautifully!
I used to make these fabric Cube Door Stops for my Etsy Shop. When making them I kept thinking, “this would make a great tutorial, this would make a great tutorial…” So here it is.
Cube Door Stop Tutorial
Supplies (other than a basic sewing kit)
1 fat quarter of fabric (use a durable fabric such as cotton drill, duck or canvas)
Matching thread
Velcro™ strip (you need 13cm for each door stop)
Cube Door Stop Pattern
For the filling
Poly-fill/toy stuffing
1.5kg dried beans, rice or dry sand (or similar)
Preparation
Cut out your fabric pieces using the pattern provided or cut:
5 side & top pieces measuring 17cm x 17cm
2 base pieces measuring 17cm x 14.75cm
1 handle piece measuring 17cm x 10cm.
Cut a piece of Velcro™ 13cm long.
Make the handle

Fold the handle piece in half lengthways, wrong sides together. Press to make a crease then open it out again.
Fold each long edge to meet at the crease you have just made. Press.
Now fold in half again lengthwise to make a long handle which is four layers of fabric.
Sew the long ‘open’ side of the handle to close it, about 6mm from the edge and keeping the edges even. Sew down the other long side too.
Centre the handle across the top piece, pin in place and baste about 7mm from the edge on both ends.
Prepare the base
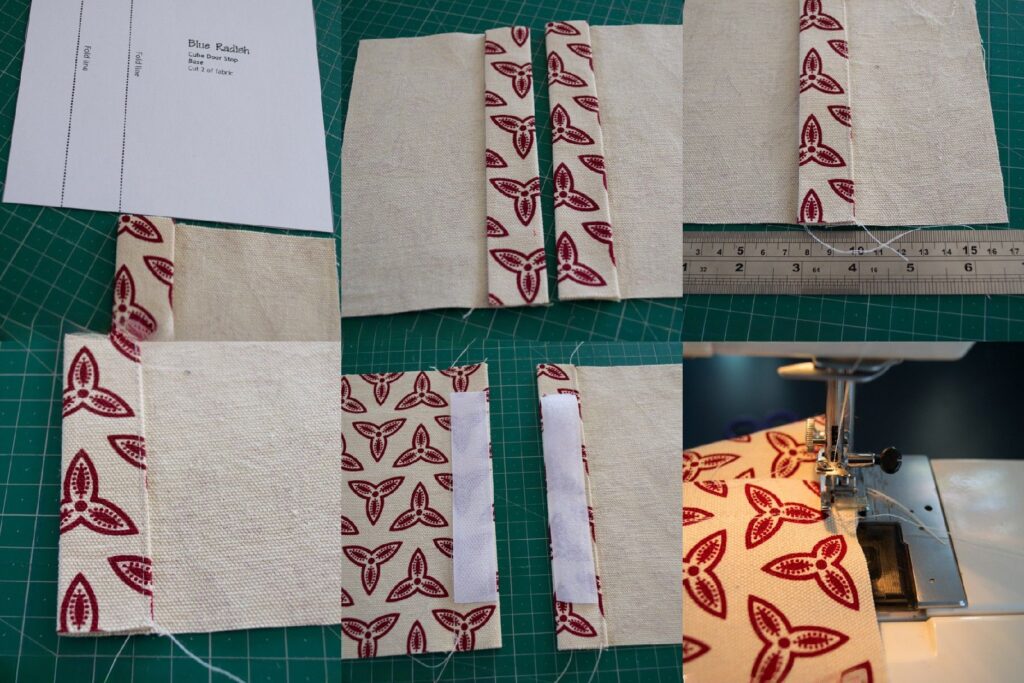
For each base piece, fold over a 2.5cm double hem along the folding lines. Each piece should measure 9.75cm when folded so that when laid one on top of the other overlapping just where the hem is, the base measures 17cm across.
Stitch the hem down 6mm from the inner fold.
On each base piece, centre the Velcro™ on the hem about 2cm from each side. Make sure you apply one side of the Velcro™ to the outside of one base piece and the other to the inside of the other. Stitch the Velcro™ in place by stitching around all the edges. Draw the thread ends through to what will become the inside of the door stop and secure by tying them together.
Stick the base pieces together by the Velcro™ ensuring that the resulting base piece is 17cm long. Baste across the hem area through all layers about 7mm from the edge on both sides. Check that the base is still 17cm square. If not, trim to size.
Make the walls
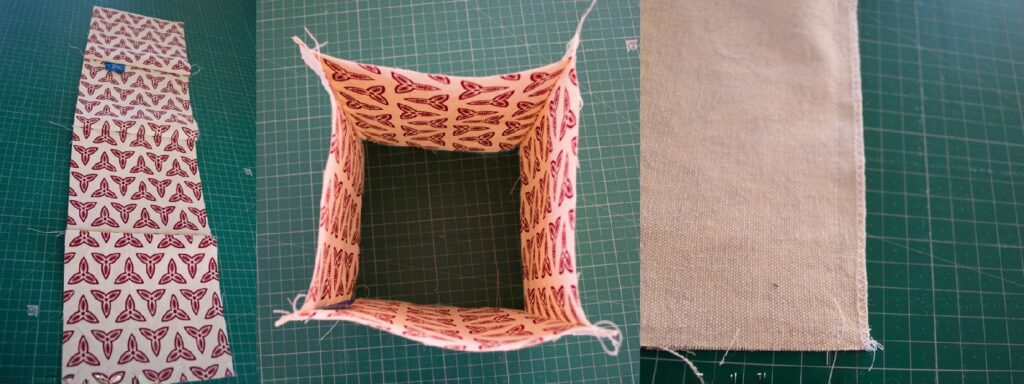
Place two side pieces right sides together. Sew down one side seam with a 1cm seam allowance.
Align another side piece with one of the pieces you have just sewn, right sides together and sew the side seam. Repeat with the remaining piece. You will have a long strip of four side pieces now.
To make the walls of the cube, align the ends of this long strip with right sides together and sew. You will now have a box without a top or a bottom.
Finish the seams with a zig zag stitch (I have used an overlocker) and press the seams flat (this is difficult to do later).
Attach the top and base of the cube
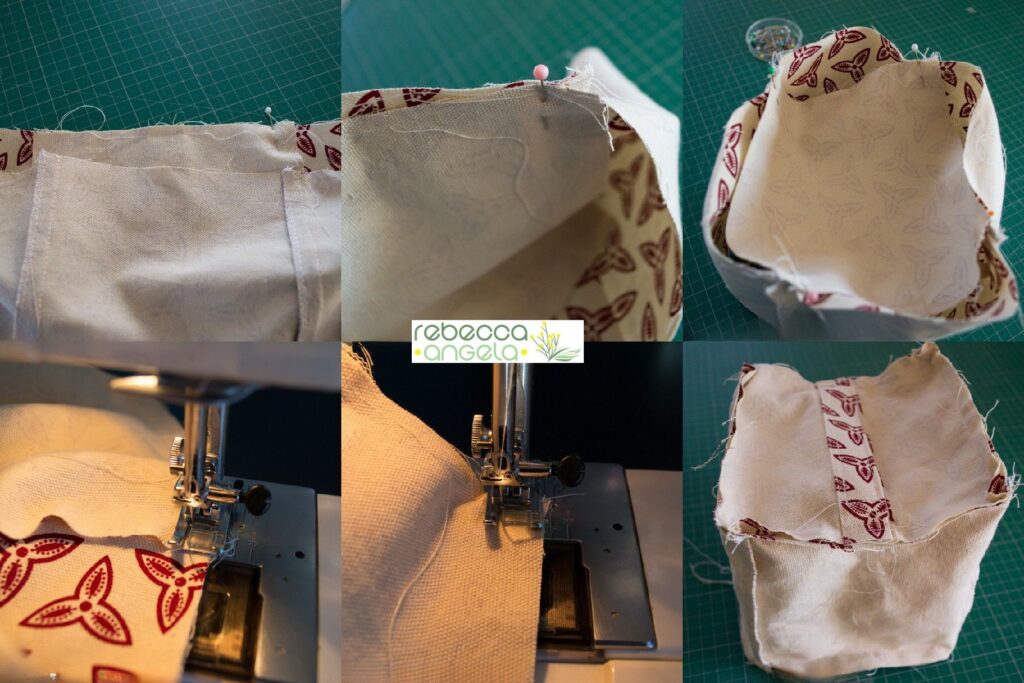
Take the top piece and, with right sides together, align the top edge of the one side piece to one edge of the top piece. You will be fitting the top piece to the inside of the walls (as they are at the moment – the right sides will eventually be on the outside, of course). The top piece will overhang the side seams by 1cm at each end. Put a pin in the corner. Turn the cube around and align each edge placing a pin in each corner.
Starting in the middle of one side, preferably not a side where the handle attaches to make it a little easier, stitch the top to the sides with a 1cm seam allowance (backstitch a few stitches where you start to secure the thread). When you get to a corner stop before you reach the side seam. Turn the hand wheel until the needle goes into the top piece fabric and through the seam below so that the corner of the top/base lines up nicely with the side seam. There should be about 1cm seam allowance on the top piece. Leave the needle through the fabric. Lift the presser foot and pivot the fabric around the needle. Pull the top piece around (you might need to pull the corner out from under the presser foot) and align the next edge of the top piece with the top of the next side piece. It will not look very neat and flat at the corner but do your best to pull all the fabric clear of the needle (both the fabric you can see at the top and the piece underneath) and it will all turn out OK.
Continue stitching around the top piece, turning in this way at each corner until you reach your starting point. Secure the thread with a few backstitches again.
Repeat this process with the base piece. I like to make the Velcro™ opening and the handle run in the same direction but this is not important as the base is not seen when the door stop is in use and it makes absolutely no difference to the function of the door stop!
Finishing
Finish the raw edges of the seams with a zig zag stitch.
Turn the door stop right way out through the Velcro™ opening in the base. Push out the corners with your finger or a chopstick.
Press the seams between the top and the sides and the base and the sides.
Filling
It is not necessary to fill the whole door stop with ‘weight’. Use a few of handfuls of poly-fill to pad out the top of the door stop.
Take a large zip lock bag and stuff it into the door stop with the opening extending out of the Velcro™ opening. Fill the zip lock bag with about 1.5kg of dried beans or rice or dry sand. Close the zip lock bag securely and push it all the way into the door stop.
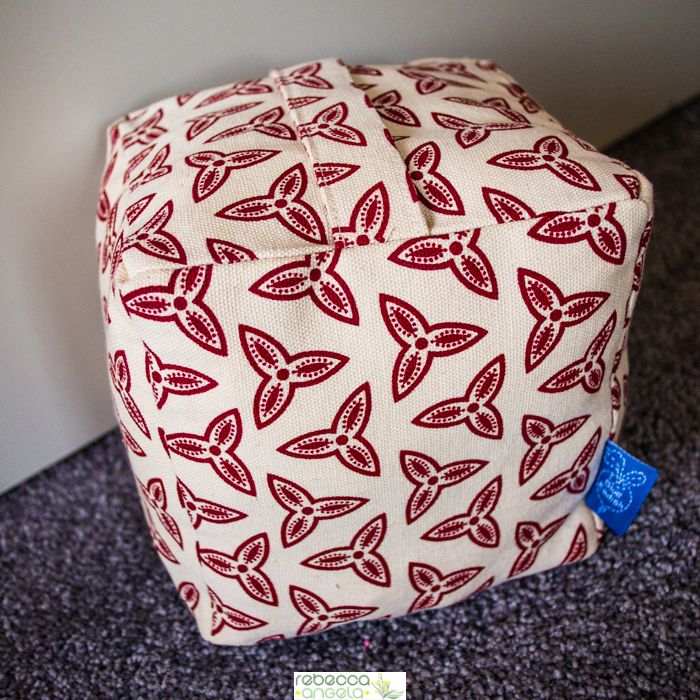
If a little more poly-fill is required, add it and then close the Velcro™ strip.
Your door stop is ready to use. Share your door stop on social media and tag me with @rebecca.angela.au or #rebeccaangela so I can see it!