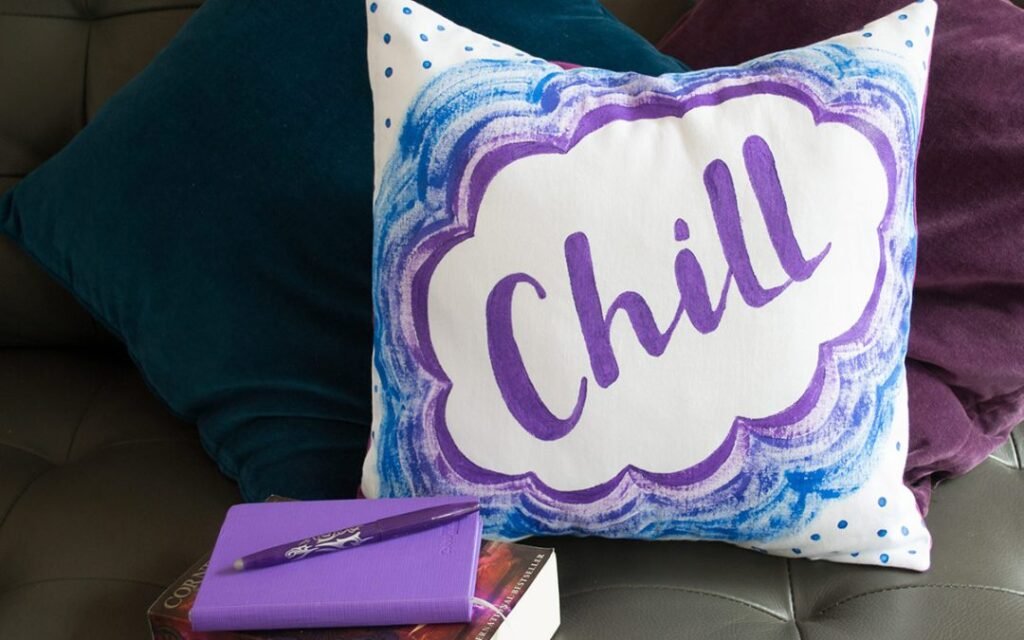
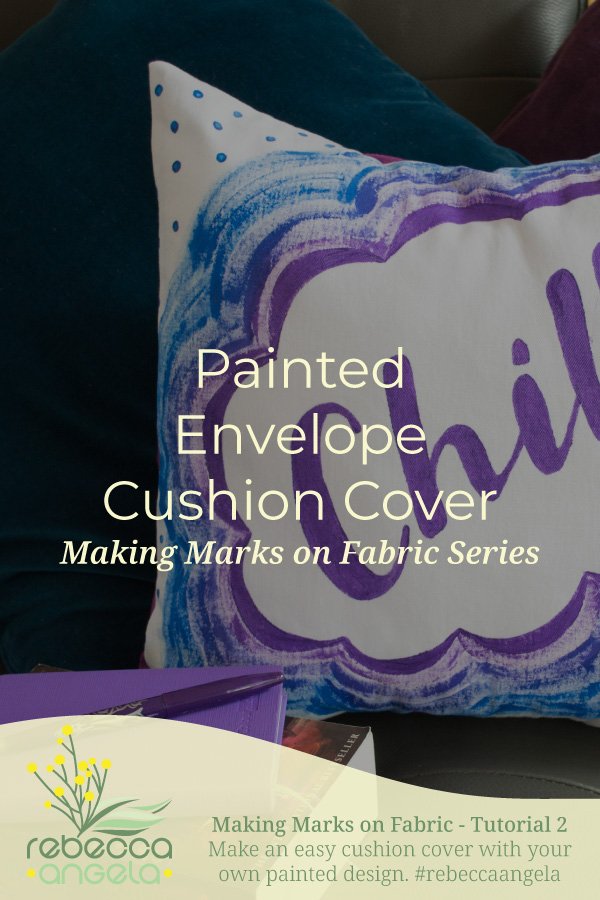
This week in the Making Marks on Fabric series, I will show you how to make a painted envelope cushion cover which features your handpainted artwork! The sewing part of this project is very, very easy and just uses straight seams!
I have kept my painted design pretty simple so you can see that you don’t need to do something elaborate for your design to be effective. Even if you are not a ‘painter’, don’t let it stop you from having some fun with fabric paints. You can have a go at a word like mine or, of course, create your own unique design. Bear in mind that this project requires a 1.5cm seam allowance so the very edges of your fabric will not be seen.
So, on with the tutorial…
This tutorial will make one cushion cover 40cm by 40cm. If you want to make a different size, you will need to adjust the fabric pieces. Just make sure you leave yourself a 1.5cm seam allowance all around and that the back pieces can overlap by about 10cm.
Materials
- 1 fat quarter of white fabric (you can, of course, paint on coloured fabric too if you prefer but keep in mind that this will change the colour that your paints appear)
- 1/2m of coordinating fabric
- Coordinating thread
- Basic sewing kit
- Tailor’s chalk
- Fabric paints
- Paint brushes
- “Chill” template (optional)
Instructions
Prepare your fabric
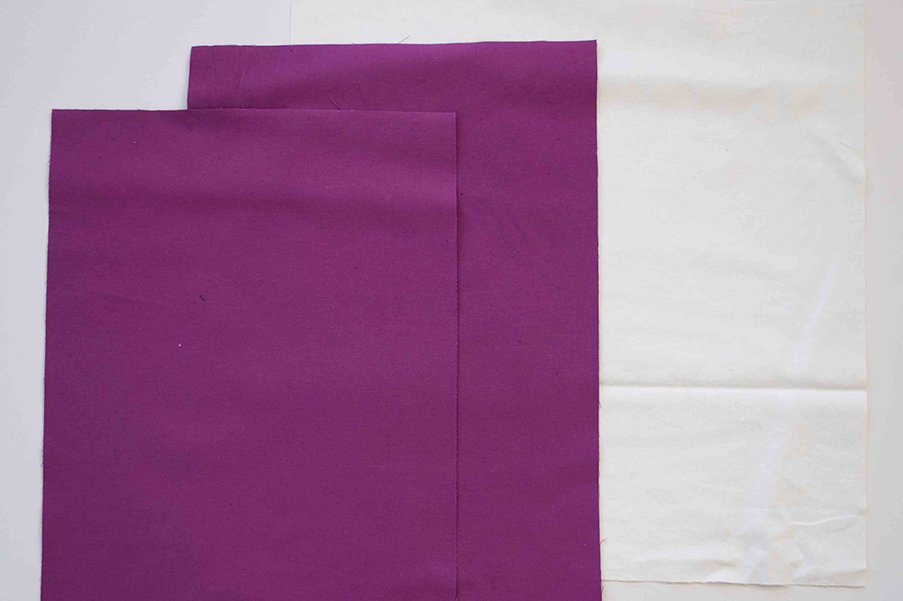
Cut your white fabric to measure 43cm by 43cm square. Cut your coordinating fabric into 2 pieces which measure 43cm by 30cm each.
Iron your white fabric so you have a flat surface to work on. My fabric was cotton drill so fairly stiff but if you think your fabric will bunch up as you paint, fix it to your surface with tape.
Note: In this project, we are painting on just one layer of fabric so there is no risk of paint leaching through to another layer. However, if you are painting a ready-made cushion cover or something like a t-shirt, protect the bottom layer by putting a layer of newspaper or cardboard between the layers.
Creating your design
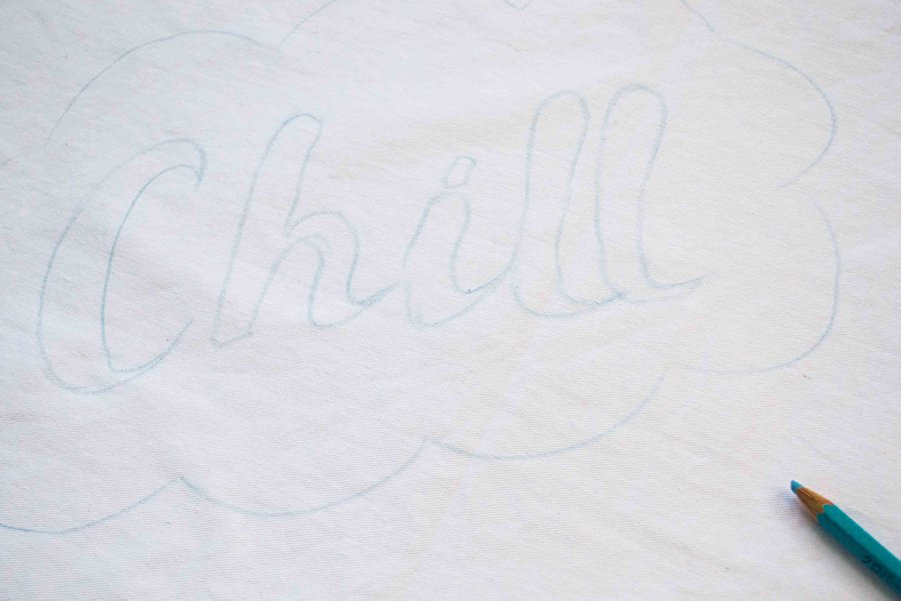
Place the printed template (or any design with dark, heavy lines) under the fabric in the desired position and, using your tailor’s chalk, lightly trace it onto your fabric. This will only work for light, thin fabrics so, if you can’t see through your fabric enough, lightly sketch your design into your fabric.
Paint your design onto your fabric. Tip: Limit your colour palette. Choose two or three colours that work well together and that suit your décor or the intended recipient.
Painting on fabric has a totally different feel from painting on paper. The paint dries quickly and the fabric absorbs a lot of paint.
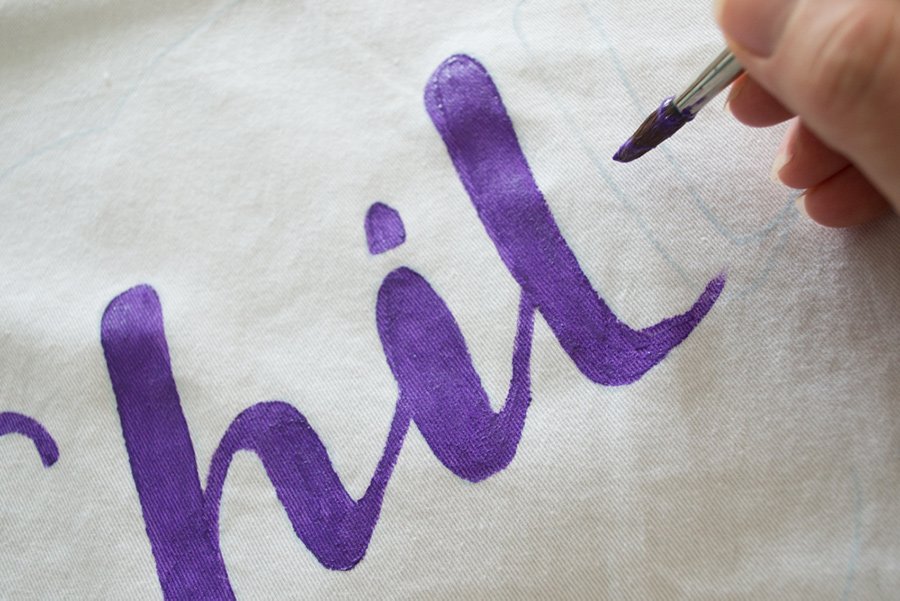
This makes mixing colours on the artwork tricky. Play around on test scraps of fabric first to determine what techniques, brush sizes and amount of paint works best for your design.
Once your design is finished it needs to dry thoroughly. My fabric paints suggest 24 hours drying time. When the paint is dry, it will need to be heat set on your fabric so that it will be permanent and washable. Follow the manufacturer’s instructions to do this. Take care to only use the maximum heat your fabric will allow – particularly with synthetic fabrics which may melt under your iron!
Sew your painted envelop cushion cover
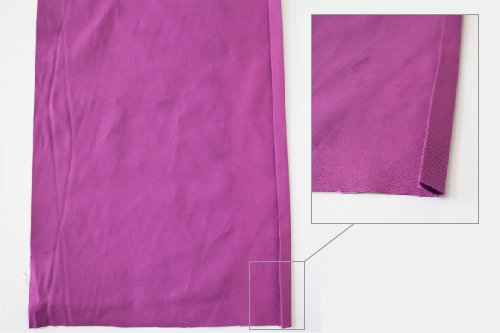
The two pieces of coordinating fabric will become the back of your cushion cover. Take each of these pieces and fold over and press a 1.5cm hem to the inside along one long edge. Fold over 1.5cm again and press to create a double hem.
Stitch the hem in place 1cm from the edge.
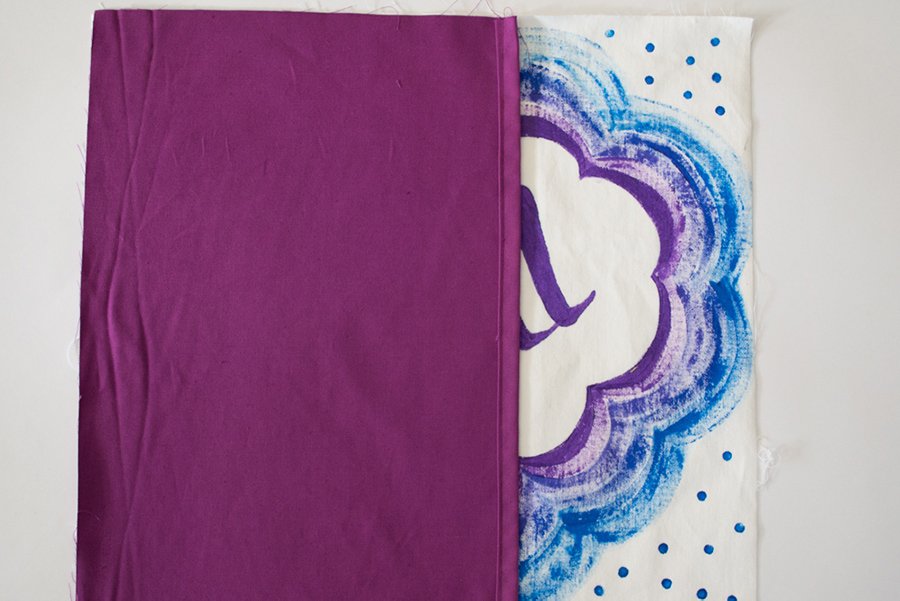
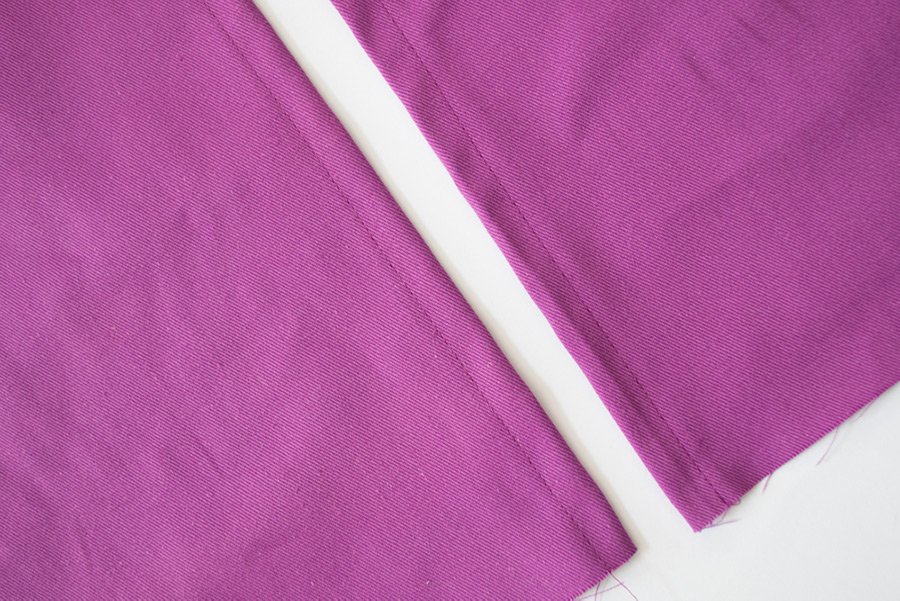
Lay your decorated front piece right side up on a flat surface. Place one back piece right side down on top of the front, to the left-hand side, making the raw edges even.Place the other back piece right side down on the right-hand side, making the raw edges even. The right piece will overlap the left piece by about 11cm.
Pin the front and back pieces together through all layers, keeping the raw edges evenly lined up with each other.
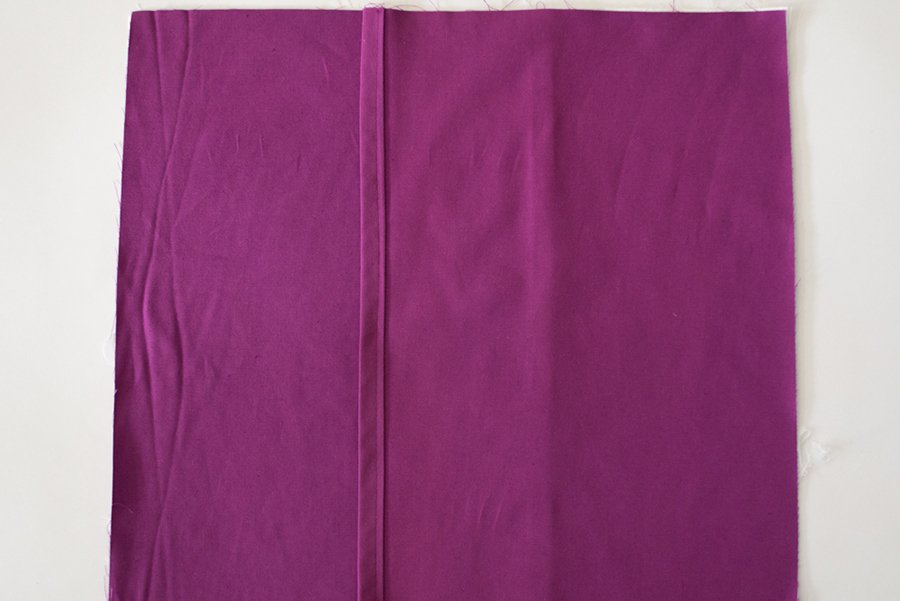
Sew all the way around the cushion cover with a 1.5cm seam, pivoting at the corners. (Brush up on sewing straight seams here including how to turn corners!)
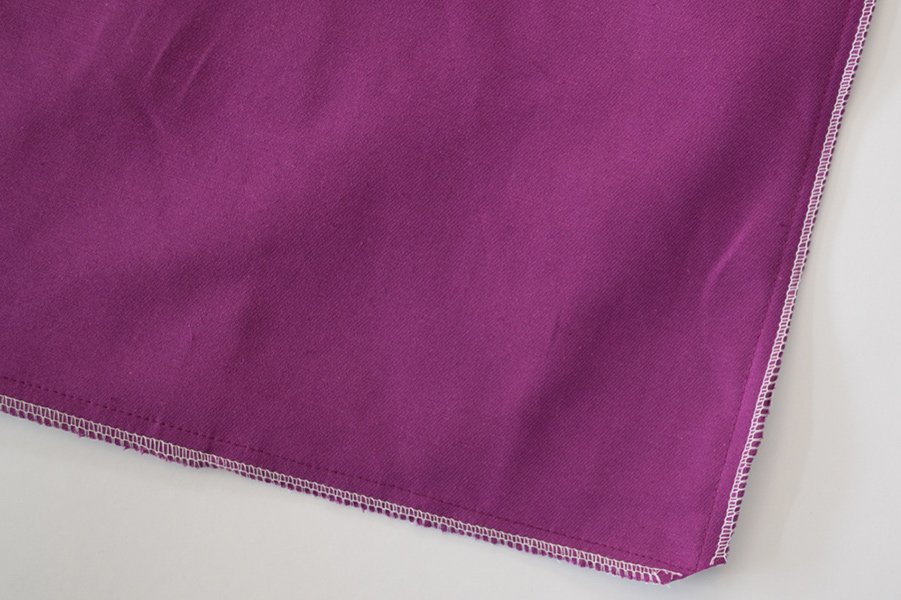
Finish the seams of your cushion so that they will not fray. See my neat sewing post for ways to finish your seams.
Clip the corners of the cushion cover and turn right side out through the envelope opening. Press.
Stuff a cushion insert into your painted envelope cushion cover and you are done!

Pingback: Tutorial – Fabric Button Suffolk Puff Brooch - Rebecca Angela