
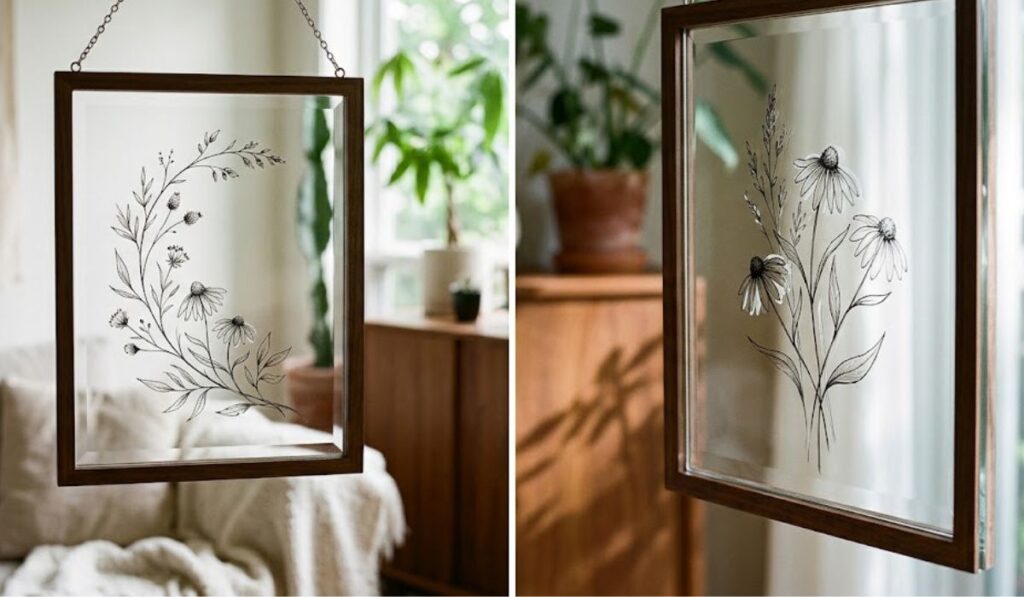

Glass is often treated as something to look through rather than something to decorate. That is precisely what makes it interesting.
Glass does not need to be covered completely to carry a design. A fine stem or loose botanical drawing may be enough. Untouched areas remain part of the composition, allowing light, shadows and the background to change the piece throughout the day. The aim is to add personality without losing the clarity that made you choose glass.
Let the Glass Remain Visible
A transparent surface cannot be approached quite like paper. An image that works on a white page may feel dense when its background disappears.
Begin by deciding which parts should remain clear. Negative space gives printed areas room to breathe and allows the design to respond to its surroundings.
Botanical motifs work particularly well for this reason. A single curved branch can guide the eye across a panel without filling it. Fine leaves, seed heads and imperfect hand-drawn flowers introduce an organic line into rooms dominated by straight edges.
If you are exploring printing on glass for the first time, start with a small flat piece and a design containing more empty space than detail. It is easier to add to a restrained composition than to rescue one that already feels crowded.
Where UV Printing Fits
No single method is right for every glass project. UV printing becomes useful when a design contains fine linework, needs to be reproduced consistently, or uses white ink to control which details appear solid and which remain translucent.
The ink is applied directly to the surface and cured with ultraviolet light. For makers working with compatible flat glass, a UV printer such as the xTool O1 Omni Printer is one way to translate a digital drawing onto the material. The machine itself is not the design decision. What matters is how selectively it is used: a fine line here, a white detail there, and enough unprinted glass for light to pass through.
Design With Light in Mind
Glass has no fixed background. A framed panel changes with daylight, while a cabinet insert responds to whatever sits behind it. A small plaque may even cast a shadow-like version of its pattern nearby.
Before preparing the final artwork, place the blank glass where it will eventually live. Notice the direction of the light and whether the background is light, dark or likely to change.
White ink does not have to sit beneath the entire design. Using it only behind a flower head, a short line of text or several leaves can create gentle variation between solid and translucent details.
Colour benefits from similar restraint. Borrowing one or two shades already present in a textile, artwork or piece of furniture usually feels more settled than introducing a new palette.
Begin With a Mark Made by Hand
Digital printing does not require the design itself to look digital.
A pencil sketch, ink drawing or small watercolour motif can be scanned or photographed and prepared as a digital file. Minor smudges and irregularities do not always need to be removed. They are often what stop the finished piece from looking generic.
Clean only what distracts, strengthen delicate lines, remove the paper background where transparency is wanted, and check the design at its intended size.
Print it on transparent film first and hold it against the glass. This reveals whether the motif is too large, too central or trying to say too much.
Choosing the Right Decorating Method
There is no single correct way to decorate glass.
Paint pens are inexpensive and immediate, suiting one-off pieces where the hand should remain visible. Decals make placement easy to test, although their edges may show. Etching creates a soft, frosted effect for geometry and lettering, but not full-colour imagery.
UV printing suits fine detail, controlled colour, white elements and repeated artwork. It need not replace hand-work: sometimes the variation of a paint pen is exactly what a piece needs.
Prepare and Test the Surface
Glass is smooth and non-porous, so preparation matters. Clean it carefully and avoid touching the printable area afterwards, as fingerprints and residue may affect the result.
Some glass and ink systems require a compatible primer. Follow the relevant guidance and test adhesion on a spare piece before beginning the final object.
Decorative panels and framed pieces are safer starting points than food-contact surfaces or objects exposed to high heat. Curved drinkware may also require a different setup from flat glass and should not be treated as the same project.
Quiet Ways to Use Printed Glass at Home
A framed botanical panel can bring pattern to a wall without the weight of a conventional print. Photo-frame inserts might carry leaves or handwriting around the edges.
Cabinet-door panels can hold sparse linework that becomes visible only when the light catches it. Small plaques can preserve a meaningful date, a fragment of handwriting or a drawing taken from a sketchbook.
The best result usually feels discovered rather than announced, changing gently as you move through the room.
None of these pieces needs to become the centre of the room. Glass is often at its best when the design reveals itself slowly. The printed motif is only one part of the finished object; the rest is completed by the light, the room and the empty space you chose to leave.

