
In the coming weeks, I have some fun projects to share with you – all to do with different ways to make marks on fabric. This week, I thought I’d make a list of some of the ways you can take a plain piece of fabric and turn it into something fabulously decorative!
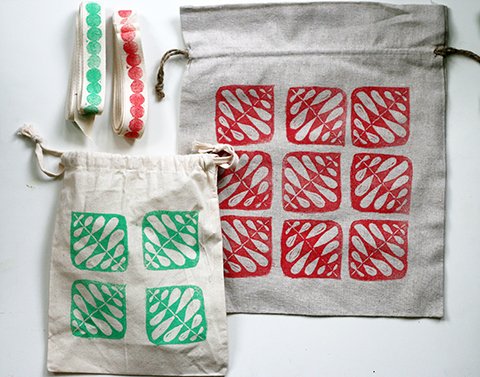
As you know, I do most of my screen printing at Megalo Print Studio in Kingston. It is an amazing facility which is open to the public (via membership) and I highly recommend taking one of their courses if you are in Canberra and interested in printmaking. I screen print at Megalo because the process is so much easier there with an enormous fabric printing table and a fully equipped washout room. However, screen printing small items at home is completely possible, especially with small screens. See my instructions to make your own cheap and easy small screens.
The list I want to make for you this week, though, is other methods and processes to make marks on fabric which you could feasibly do at home with some examples to inspire you. Usually, you will have to invest a little in materials but you may find you have some of the things you need at home already. Over the next few blog posts, I will elaborate on some of these with project tutorials for you to follow yourself.
So, without further ado, here are 10 ways to make marks on fabric…
Make Marks on Fabric with…
Fabric Markers
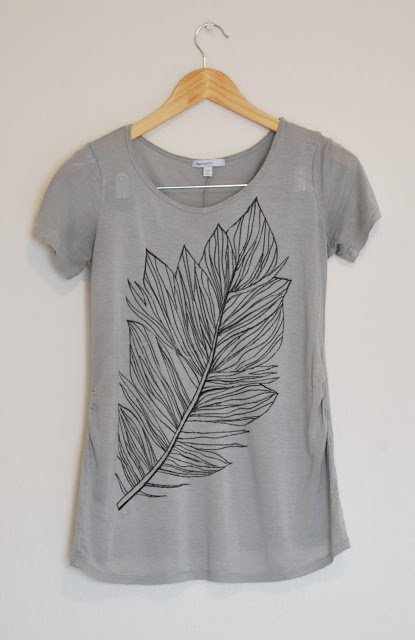
These don’t need much introduction. Coloured markers which are permanent when applied to fabric so the item can be washed without the drawing washing off. Some brands may need to be set in some way, usually with heat. Simply draw directly onto your fabric. Or, if you are not comfortable drawing free-hand, trace or use a stencil. Here’s a lovely, simple – but very effective – example from Merrick’s Art.
Fabric Painting
There are all sorts of ways to apply paint to fabric. Some will be mentioned below. But if you like to express your creativity with a brush, you can paint directly onto your fabric of course. Your designs don’t have to be complicated and detailed. Look at this simple but effective project from Idle Hands Awake.
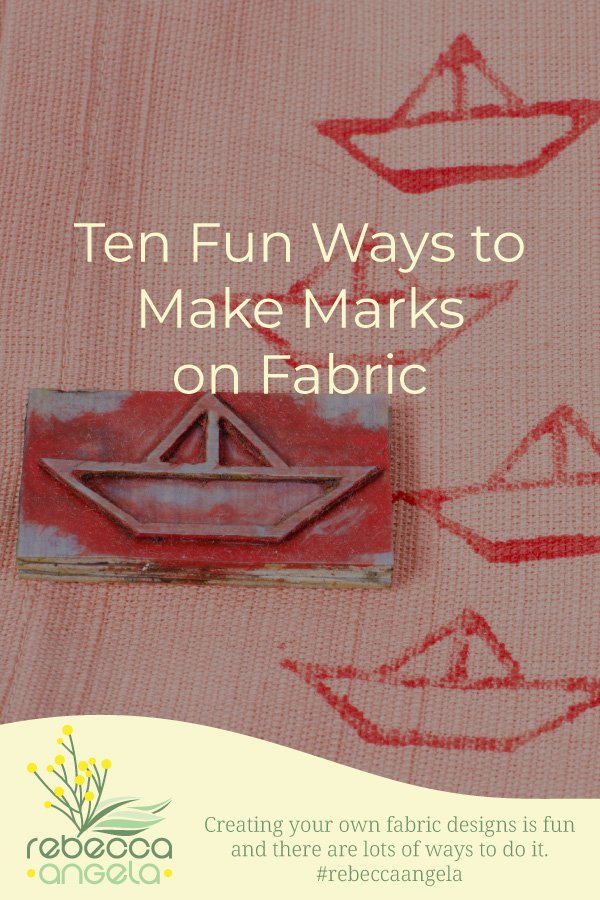
Stamping

The things you can use to stamp with are just about limitless! I’ll bet you did a potato print or two in preschool but don’t dismiss potato printing as being only for the under-fives. Here is a lovely design printed with potato from Christine Schmidt in The Guardian.
Using a simple shape in repeat works best with potatoes. Narrow lines in your design will break. For more intricate designs, you can buy ready to use stamps for a few dollars each from art & craft stores. You can also make your own stamps with a scrap piece of timber and craft foam. Or print with some found objects such as leaves, cut fruit and vegetables, hardware. Let your imagination run wild. Anything with a flat surface and an interesting shape or texture is a candidate!
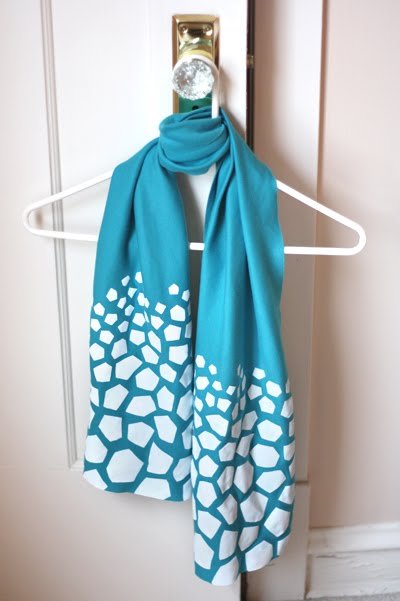
Freezer Paper Stencilling
Freezer paper is something you can pick up readily from supermarkets in the US but it is a little harder to get your hands on in Australia. Some art, craft or sewing supplies stores now have it.
If you can find it, freezer paper has many craft applications. For example, freezer paper will stick to fabric when it is ironed but is easily removed later so it makes a great stencil which will not move while you paint it. It can be cut into intricate designs like this one from How About Orange.
Dying with Bleach
This is something like the reverse of dying really! Bleach, as we all know – often because of a miserable cleaning accident – removes colour from fabric. However, use this property to your advantage and make something fabulous with this technique. Here’s an example from The Crafted Life.
Apply it with a brush or with a tool such as a stamp or the eraser end of a pencil (bleach pointillism?) – there are lots of fun ways to ‘reverse dye’ your fabric. And bleach is probably already in your laundry cupboard.
Shadow Printing with Photo-reactive Dyes

Did you ever use light-sensitive paper (‘sun paper’) as a kid to develop a shadow image using the sun? Well, there’s are products that use the same principle with fabric. Inkodye was a solar activated fabric dye which you painted onto your fabric or t-shirt and use shadows (or transparencies to create photographic images) to leave an image after the fabric is exposed to the sun. It is no longer available but this is a similar product by Jacquard.
Lino Printing
Lino printing is a process in which you essentially make a stamp by cutting a design into a piece of lino. You then apply the ink to the lino and press it to the fabric leaving a print. Designs can be simple (which always looks great in repeat) or more complicated (think of those amazing Indian cottons). Here’s a simple but lovely lino printed project by Jen Hewett.
To do lino printing you will need a few things so the cost can add up but everything except the lino you can use again and again (and the lino stamp can be used over and over). So, firstly, lino. There are some ‘easy-cut’ brands around. You’ll also need some tools to cut the lino. And of course fabric paint and something to apply it to the block. Lino prints are created on paper with block printing ink but if you want a durable print on fabric you will need a fabric paint. Any fabric paint with a bit of body will work. I use Permaset Aqua. It is applied to the lino with a foam roller.
Tie-Dye

Yes, the good, old tie-dye. The 60s would not have been the same without it! It has had a resurgence of kinds lately and there’s more to tie-dye than you might think. This is another process that brings back memories of primary school – getting bored of tying yet another piece of string around a handful of t-shirt. However, there are amazing effects that can be produced with pleating and folding such as in Japanese Shibori, traditionally dyed with indigo. Look at these napkins by Alice & Lois. Don’t they give you a whole new respect for tie-dye?!
Iron-On Transfer Paper

Iron-on transfer paper makes it possible to put anything you can print out of your computer onto fabric. Now that could be a Pokemon character for you son’s t-shirt but don’t let your imagination be stifled! There are a world of amazing images out there. Here is a seriously cool project from Adrienne Elizabeth Home Style Life using iron-on transfer paper.
Inkjet Printing on Fabric
Yes, it is apparently possible to print directly onto your fabric with your inkjet printer. Be aware though, when I tried this I actually damaged my printer.
The key is to stabilise the fabric somehow. The elusive freezer paper works for this but there are other options, such as sticking your fabric to a sheet of card with spray adhesive or using A4 size labels. You can only print a piece of fabric small enough to fit through your printer, of course. There are also print-on-fabric sheets but I have only seen them online and they are expensive.
Your print will also have to be set to make it permanent and washable. Serendipity Refined, whose project appears above, gives a recipe for doing this.
Have you tried these?
So there you have it, ten ways to make marks on fabric that you can do at home. Look out for upcoming projects using these techniques but in the meantime, please let me know if you try any of them. Have you done any of these things in the past? What was your experience like? Can you share photos of your projects? I’d love to see them!
Further Reading
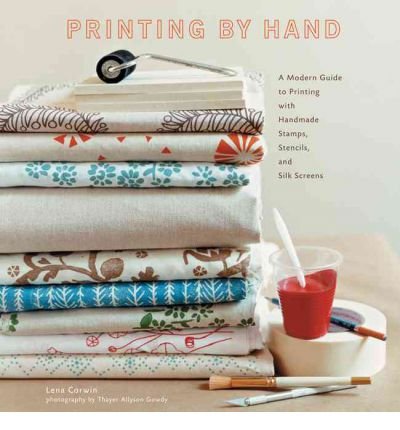
So that is my list of ten ways to make marks on fabric. If you are keen and would like more ideas and projects, Lena Corwin’s Printing by Hand is a fabulous resource. It gives great instructions with beautiful clear photography for lovely printing projects.

Pingback: Tutorial – Fabric Marker Softie - Rebecca Angela
Pingback: Beware of Printing on Fabric with an Inkjet Printer - Rebecca Angela
Pingback: Tutorial – Fabric Button Suffolk Puff Brooch - Rebecca Angela