I hope you’ve mastered sewing straight seams now. How are you going on the curves? If you have been making masks, you may be facing sewing around curves. Let’s look at some tips and tricks for sewing curves and getting a lovely neat end product. If you need to refresh your memory about sewing seams before we start go back and reread Sewing Straight and Easy Beginner Projects. And if you need to brush up on your sewing terminology refer to Sewing Terms Explained. Right, let’s get into it!
Types of Curved Seams
There are two types of curves – inward curves and outward curves.
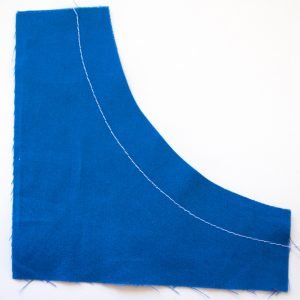
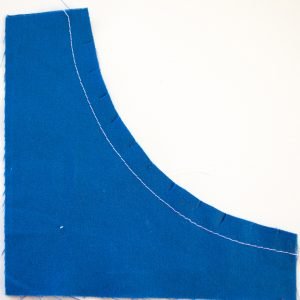
An inward curve is the sort of curve you make when you take a bite out of a sandwich – what I learnt as ‘concave’ when I was at school.
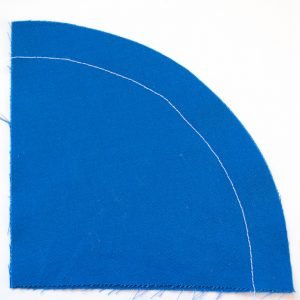
An outward curve is the opposite (unsurprisingly!) Think of the outside of a circle. (This is convex according to my high school maths teacher).
Sewing either type of curved seam is essentially the same. And sewing curves does not differ too much from sewing straight seams so now you’ve mastered those, curves will be a walk in the park.
Sewing Around a Curve
The seam allowance around the curve needs to stay consistent as when you sew any seam. I discussed why this is important in the post on sewing straight seams – and remember to check the seam allowance required for the pattern you are using. The trick with curved seams is the same as for straight seams: watch the fabric not the needle. Keep the edge of your fabric lined up with the seam allowance guide on the stitch plate. To keep the seam allowance even, you will need to take it slowly around the curve. Let your foot off the pedal and inch your way around as necessary.
When curves are particularly tight you might need to use the pivot method described under Turning Corners in Sewing Straight. Obviously you aren’t going to turn the fabric a full 90° on this occasion – just turn it a tiny bit each time or you will end up with a curve that isn’t very neat. You might need to pivot like this a few times around the curve depending on how tight it is.
Another helpful tip for sewing around tight curves is to use shorter stitches. This will help to keep on your seam allowance line by working around it in smaller steps.
Speaking of lines, when you are first learning to sew curved seams, you could actually draw the line in tailor’s chalk onto the wrong side of your fabric. If you don’t have a sewing gauge, I saw a nifty little trick the other day to draw seam allowances with pencils tied together which will help keep the line exactly the correct distance from the edge of the fabric. Drawing the seam line, however, makes you look at the needle rather than using the seam allowance guides on the stitch plate so I encourage you use this method only until you have built up a bit of confidence with curves. It is time consuming to add this step to your sewing anyway – and who has time for that??!
Clipping and Notching Curved Seams
Curved seams will need a little extra treatment before you head to the ironing board for pressing. You will need to put some cuts into the seam allowance. When the curve is turned right way out, unclipped fabric will not stretch (inward curve) or will pucker (outward curve) and you will not be able to press it flat.
How To Clip Inward Curves
An inward curve needs to be clipped in order for it to stretch out when it is turned to the inside. First of all, trim the seam allowance to about 1cm. Take your small scissors and, using the tips of the blades – rather than further down to avoid cutting too far – make small snips toward the seam allowance to within about 4-5mm of the stitching. Take care not to cut the line of stitching. Make snips about 1.5cm from each other around the curve. A gentler curve might need snips further apart and a sharper curve might need more closer together. You will get a feel for it over time. If the seam doesn’t lie flat you can make more snips.
How To Notch Outward Curves
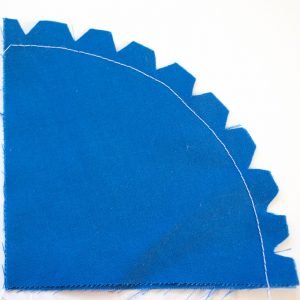
For an outward curve, there will be excess fabric when the seam allowance is turned to the inside so the treatment is different. Outward curves are notched to remove the excess fabric which would otherwise cause lumpiness and puckering. Once again, trim the seam allowance to about 1cm. Then, using the scissor tips, cut little triangles of fabric out of the seam allowance taking care as before not to cut through the stitching. The points of the triangles should be about 4-5mm from the stitching line. As with inward curves, the distance between the notches will vary depending on the tightness of the curve. Aim for every 1.5cm or so and if your seam still does not lie flat, take out some more notches. With your snipping and notching done, you can turn the seam right side out and the seam allowance will be able to accommodate being the other way around. You can now press the seam and it will lie flat.

As always I want to hear how you get on. Let me know in the comments below your triumphs and struggles with curved seams. Also, do you have any more tips and tricks to share? Please share them!
Pingback: Ten Things to Sew with Boys - Rebecca Angela